Reviews
TBS Vendetta: Build Log & Review
Posted on May 30, 2016 • 16 min read • 3,215 words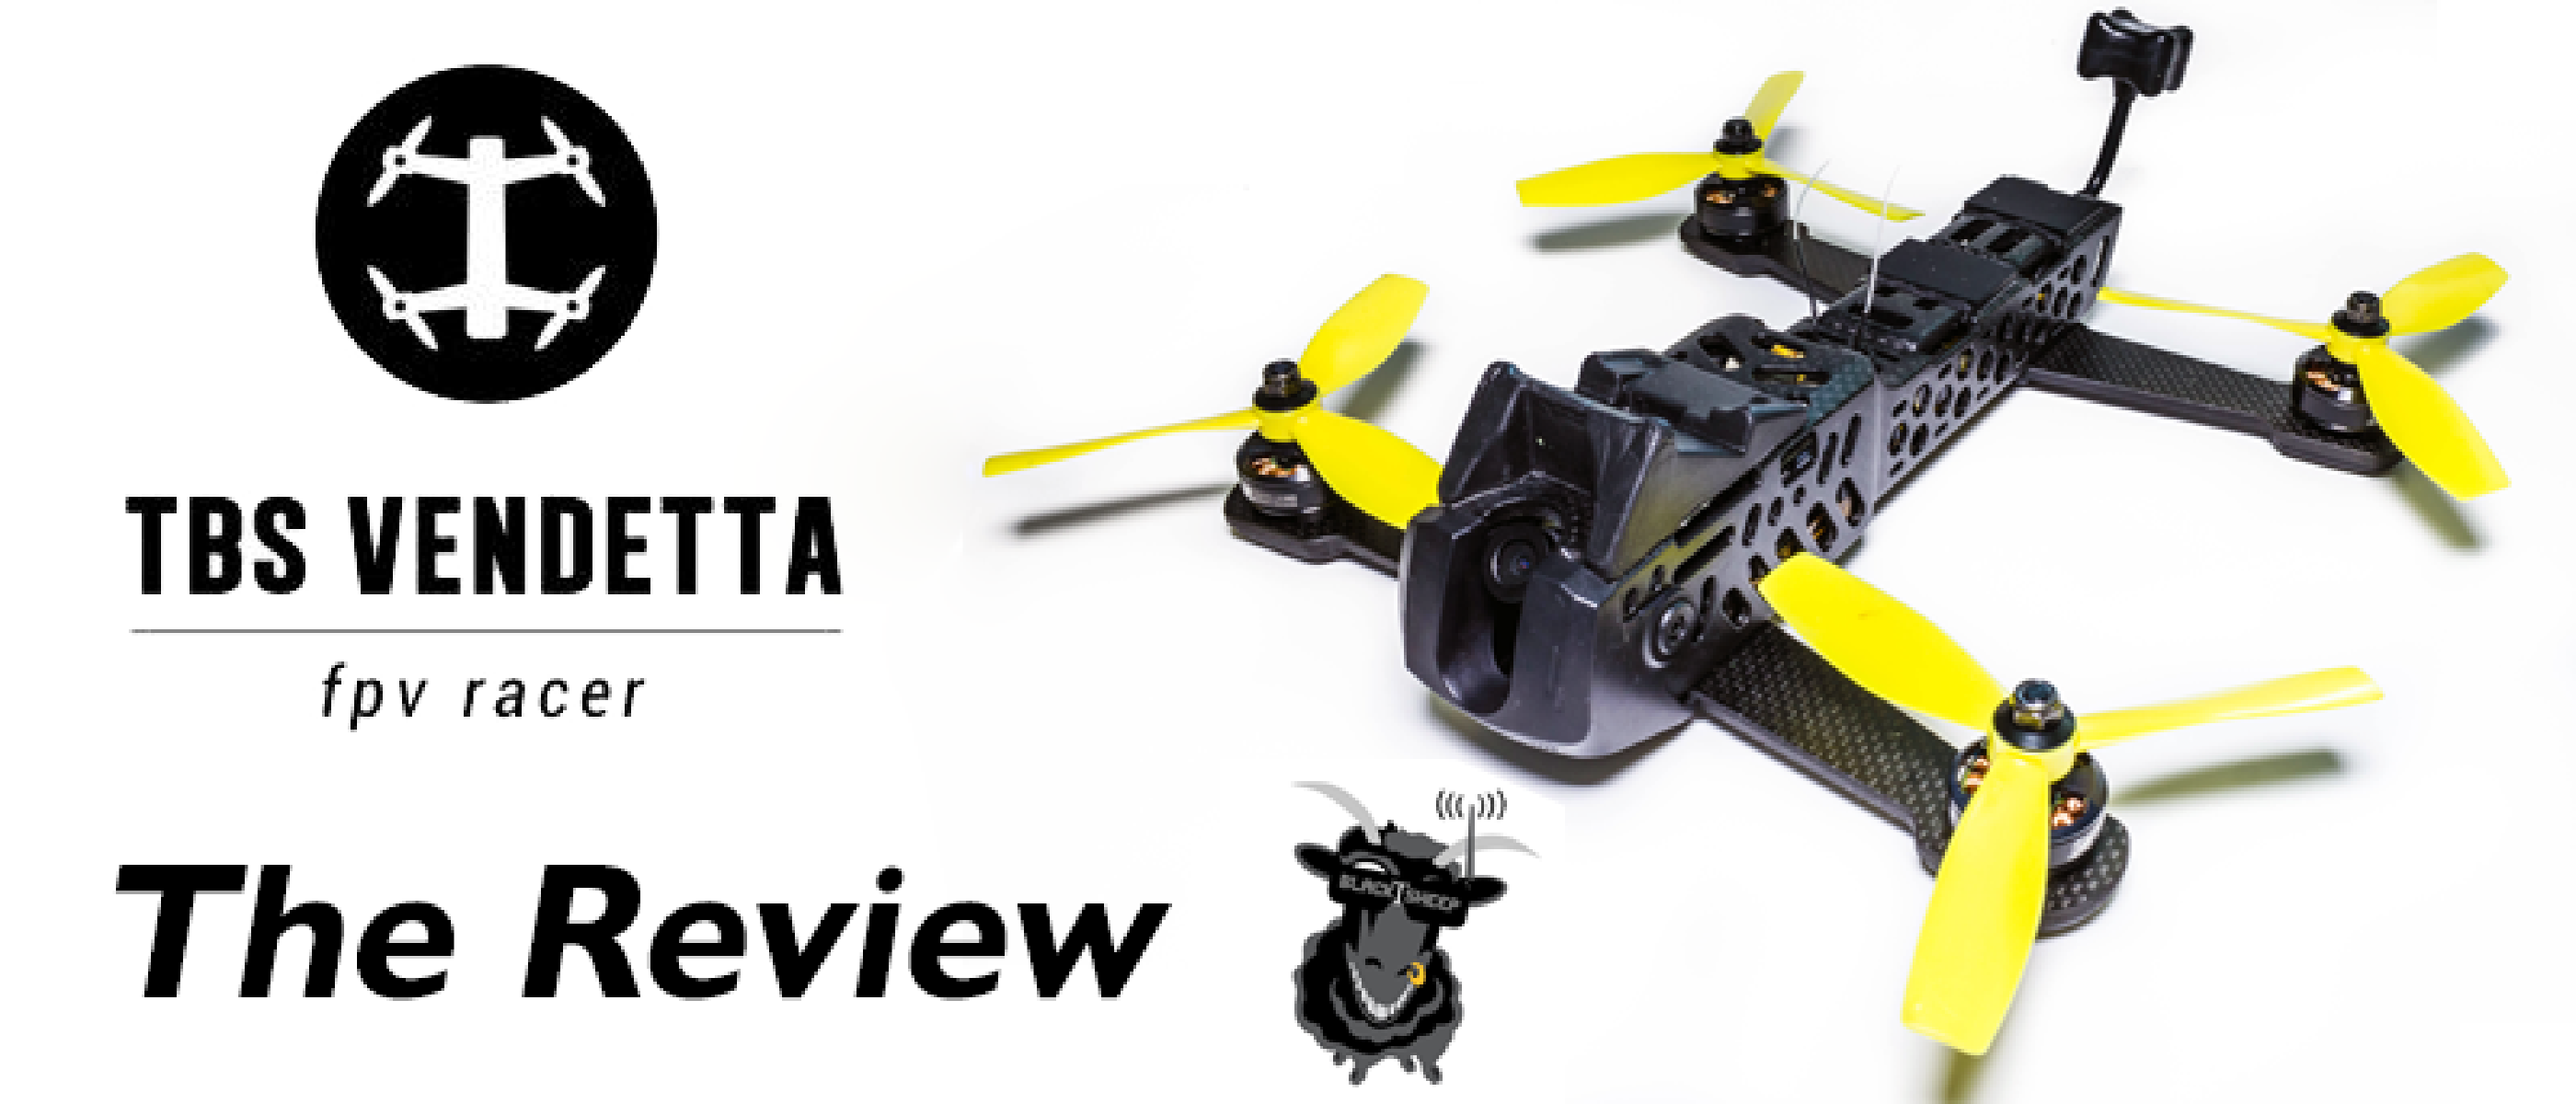
What? RTF FPV Racer for 5" props How? Won on the MegaDroneX livestream Why? Always wanted a good looking and great spec RTF.
Features
Here’s the generic features taken straight from the TBS description:
- 240-sized RTF FPV Racer
- Quick-replace 3.5mm carbon fiber arms, MT30 connectors
- Cobra CM2204/2300kV Motors, HQ 5x4x3 Props
- TBS PowerCube with fastest F3 board available, 2-6S capable Bulletproof 30/50A ESCs
- Compatible with PPM, SBUS, XBUS, Spektrum R/C systems
- Fully configurable via OSD, no PC required
- GoPro 3/4 and Mobius / Runcam mount included, both 10 and 30 degree variations
- Lost model alarm
- 410g weight without Battery or HD camera
And Trappy’s own Vendetta intro video:
What’s in the box
So what do you get? Well, the box was extremely small - way smaller than I was used to. I had to question if the box actually contained the quad or not!

The signature on the top is by Zachary Thayer of Team BIG WHOOP, I actually won this quad as part of the MegaDroneX indoor cave race social media competition so I’m completely over the moon. I watched the event live until the very early hours of the morning here in the UK and it was totally worth it, some great racing and commentary from Scully. Anyway, back to the quad itself… :)

Here’s a quick slideshow of what you actually get in the box. It’s all very neatly packed and there’s a lot of stuff in the box. From my point of view some sort of packaging would have been nice, only to stop some of the parts moving around - the GoPro mounts are a little bashed, which while is only aesthetics, is a new quad and so should be as such. Though I do appreciate this quad has probably moved around much more than many others, travelling 3 of the major continents before it landed on my doorstep!
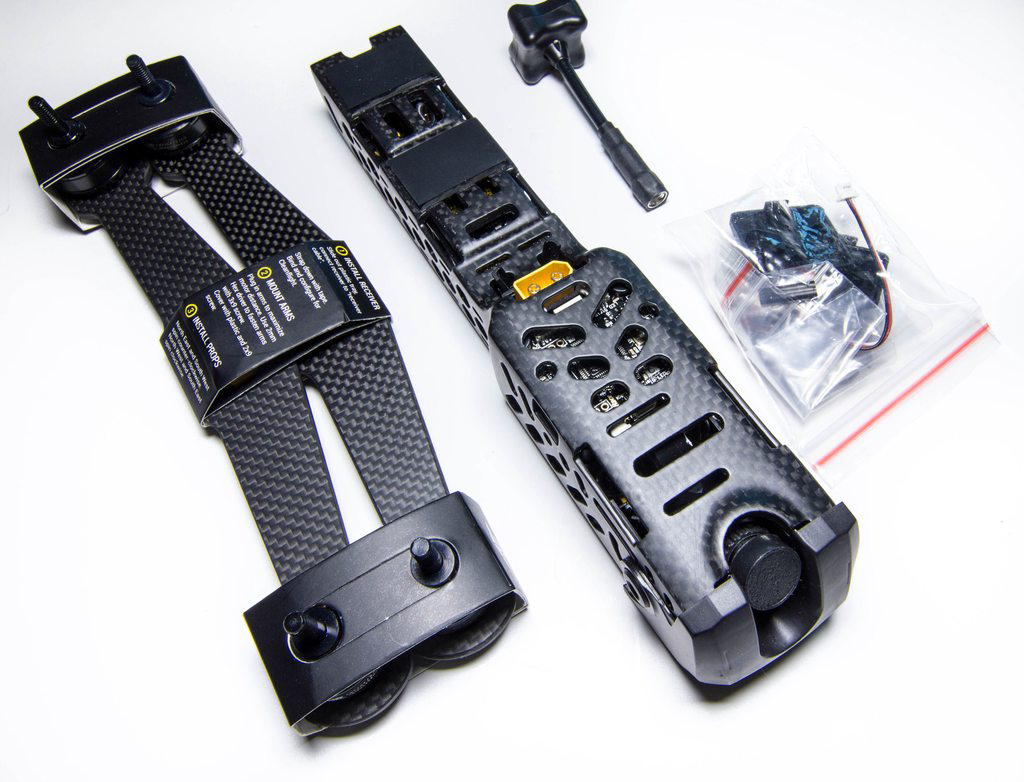
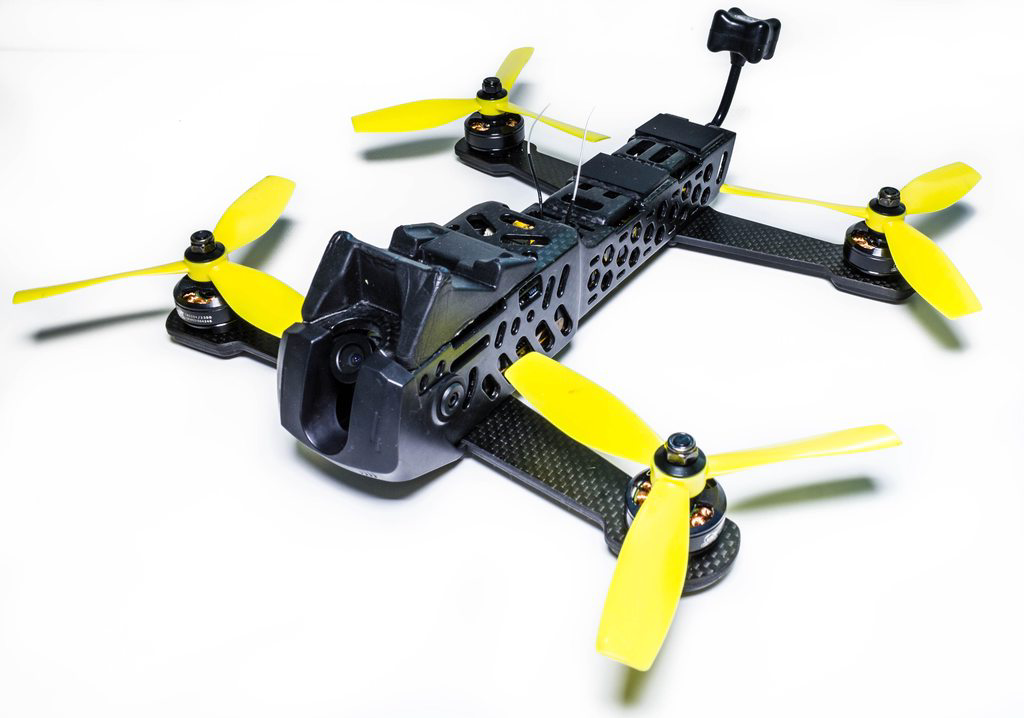
So, packaging aside the main items we’re interested in right away is the gorgeous full carbon fiber monocoque body - this thing really is a work of art. For me, this is what sets itself apart from the Vortex - it’s a very unique feature of the Vendetta, not even just unique to the RTF quads but I believe this is the only frame at all for quad racing that has been manufactured like this. Aside from the eye-candy it feels extremely strong, the exterior finish is great with all of the little holes and details across it. You can see a lot of thought has been put into this.
To the left of that we have the pair of arms, with pre-installed Cobra 2204 2300kv motors. Again, these look super tidy, the fact there is a full set of motor wires and connectors on the arms does not take anything away from them, they look super tidy and I can’t wait to see how the Cobras perform on a quad like this (I’m used to relatively light quads now).
We also have a bag of accessories used to screw the arms to the body, various screw covers and some extra cables for connecting your receiver etc. And last but not least, we cannot forget the TBS Triumph antenna. If you’ve seen my blog post regarding these, you’ll know these antennas are fantastic, and pulled ahead of any other that I tested. It’s not even so much the performance of them which I like, but the fact they are so small, and seem to be super durable so far. I’ve still not broken them whatsoever, and I’ve had them for a good few months now.
If you want to see more close up images of the slideshow then you can view them separately here.
Installation & Close Ups
I could probably stare at the body all day, but actually I need to get out and fly it. I have a small criticism here in the fact that the only instructions provided are those written on the motor arm packaging, which state:
- Install receiver - slide out plastic tray, connect receiver to “receiver cable”. Strap it down with tape. Bind and configure for Cleanflight
- Mount Arms - Plug in arms to maximize motor distance. Use 2mm Hex driver to fasten arms with 3x9 screw. Cover with plastic and 2x9 screw.
- Install Props - North East and South West spin counter-clockwise. North West and South East spin clockwise.
For me, this is quite a simple thing as I’ve built a lot of quads before, but to the newbie entering into the sport they may be asking “well what’s a receiver cable?”. The instructions do give a little blurb with them, but I think a little extra (perhaps with pictures) would go a long way.
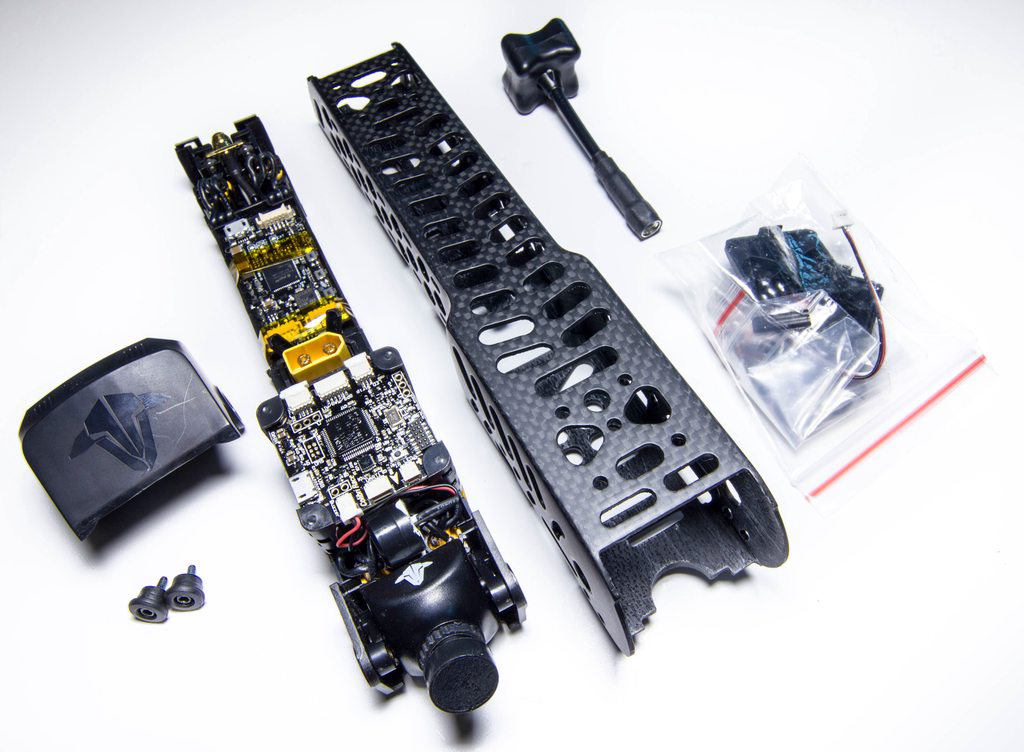
With that being said, let’s open up the pod and remove it to see what we have hiding in the body. This is an easy and pretty self-explanatory process, we just need to remove the 2 front plastic camera fascia screws, and the body will slide out.
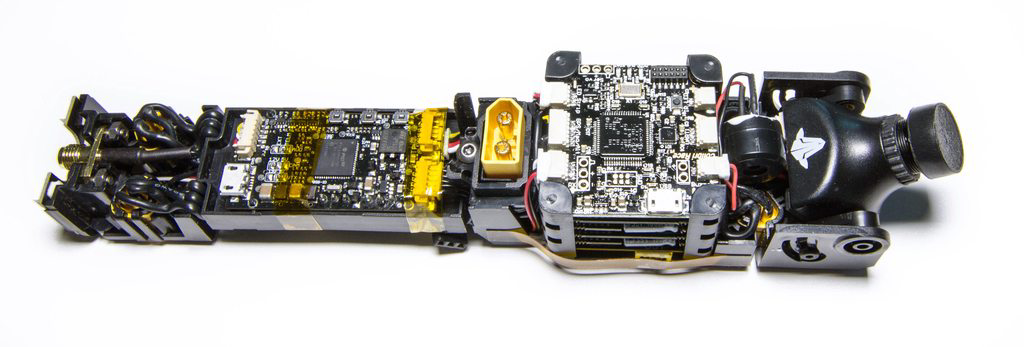
Immediately we can see there’s been a lot of thought gone into the design of this, everything is very neatly packed, lots of circuitry and wires everywhere. To the untrained eye we can determine from the left to the right we have our video RP-SMA connector pigtail sticking out the rear for the Triumph to screw into, with the motor wiring above and below that. Next, we have the TBS Core Pro which has many features, including an OSD, Current information and integration with the video transmitter and flight controller to allow the user to configure and view all of the important items they need to such as PIDs, Video Channel and video power output. Up next we’ve got the usual XT60 connector to plug your lipo into - for me, this would have looked so much better in black, but I realise the black connectors can be hard to get hold of. Just a minor criticism from me, but the “whole-black” look would have finished it off nicely.
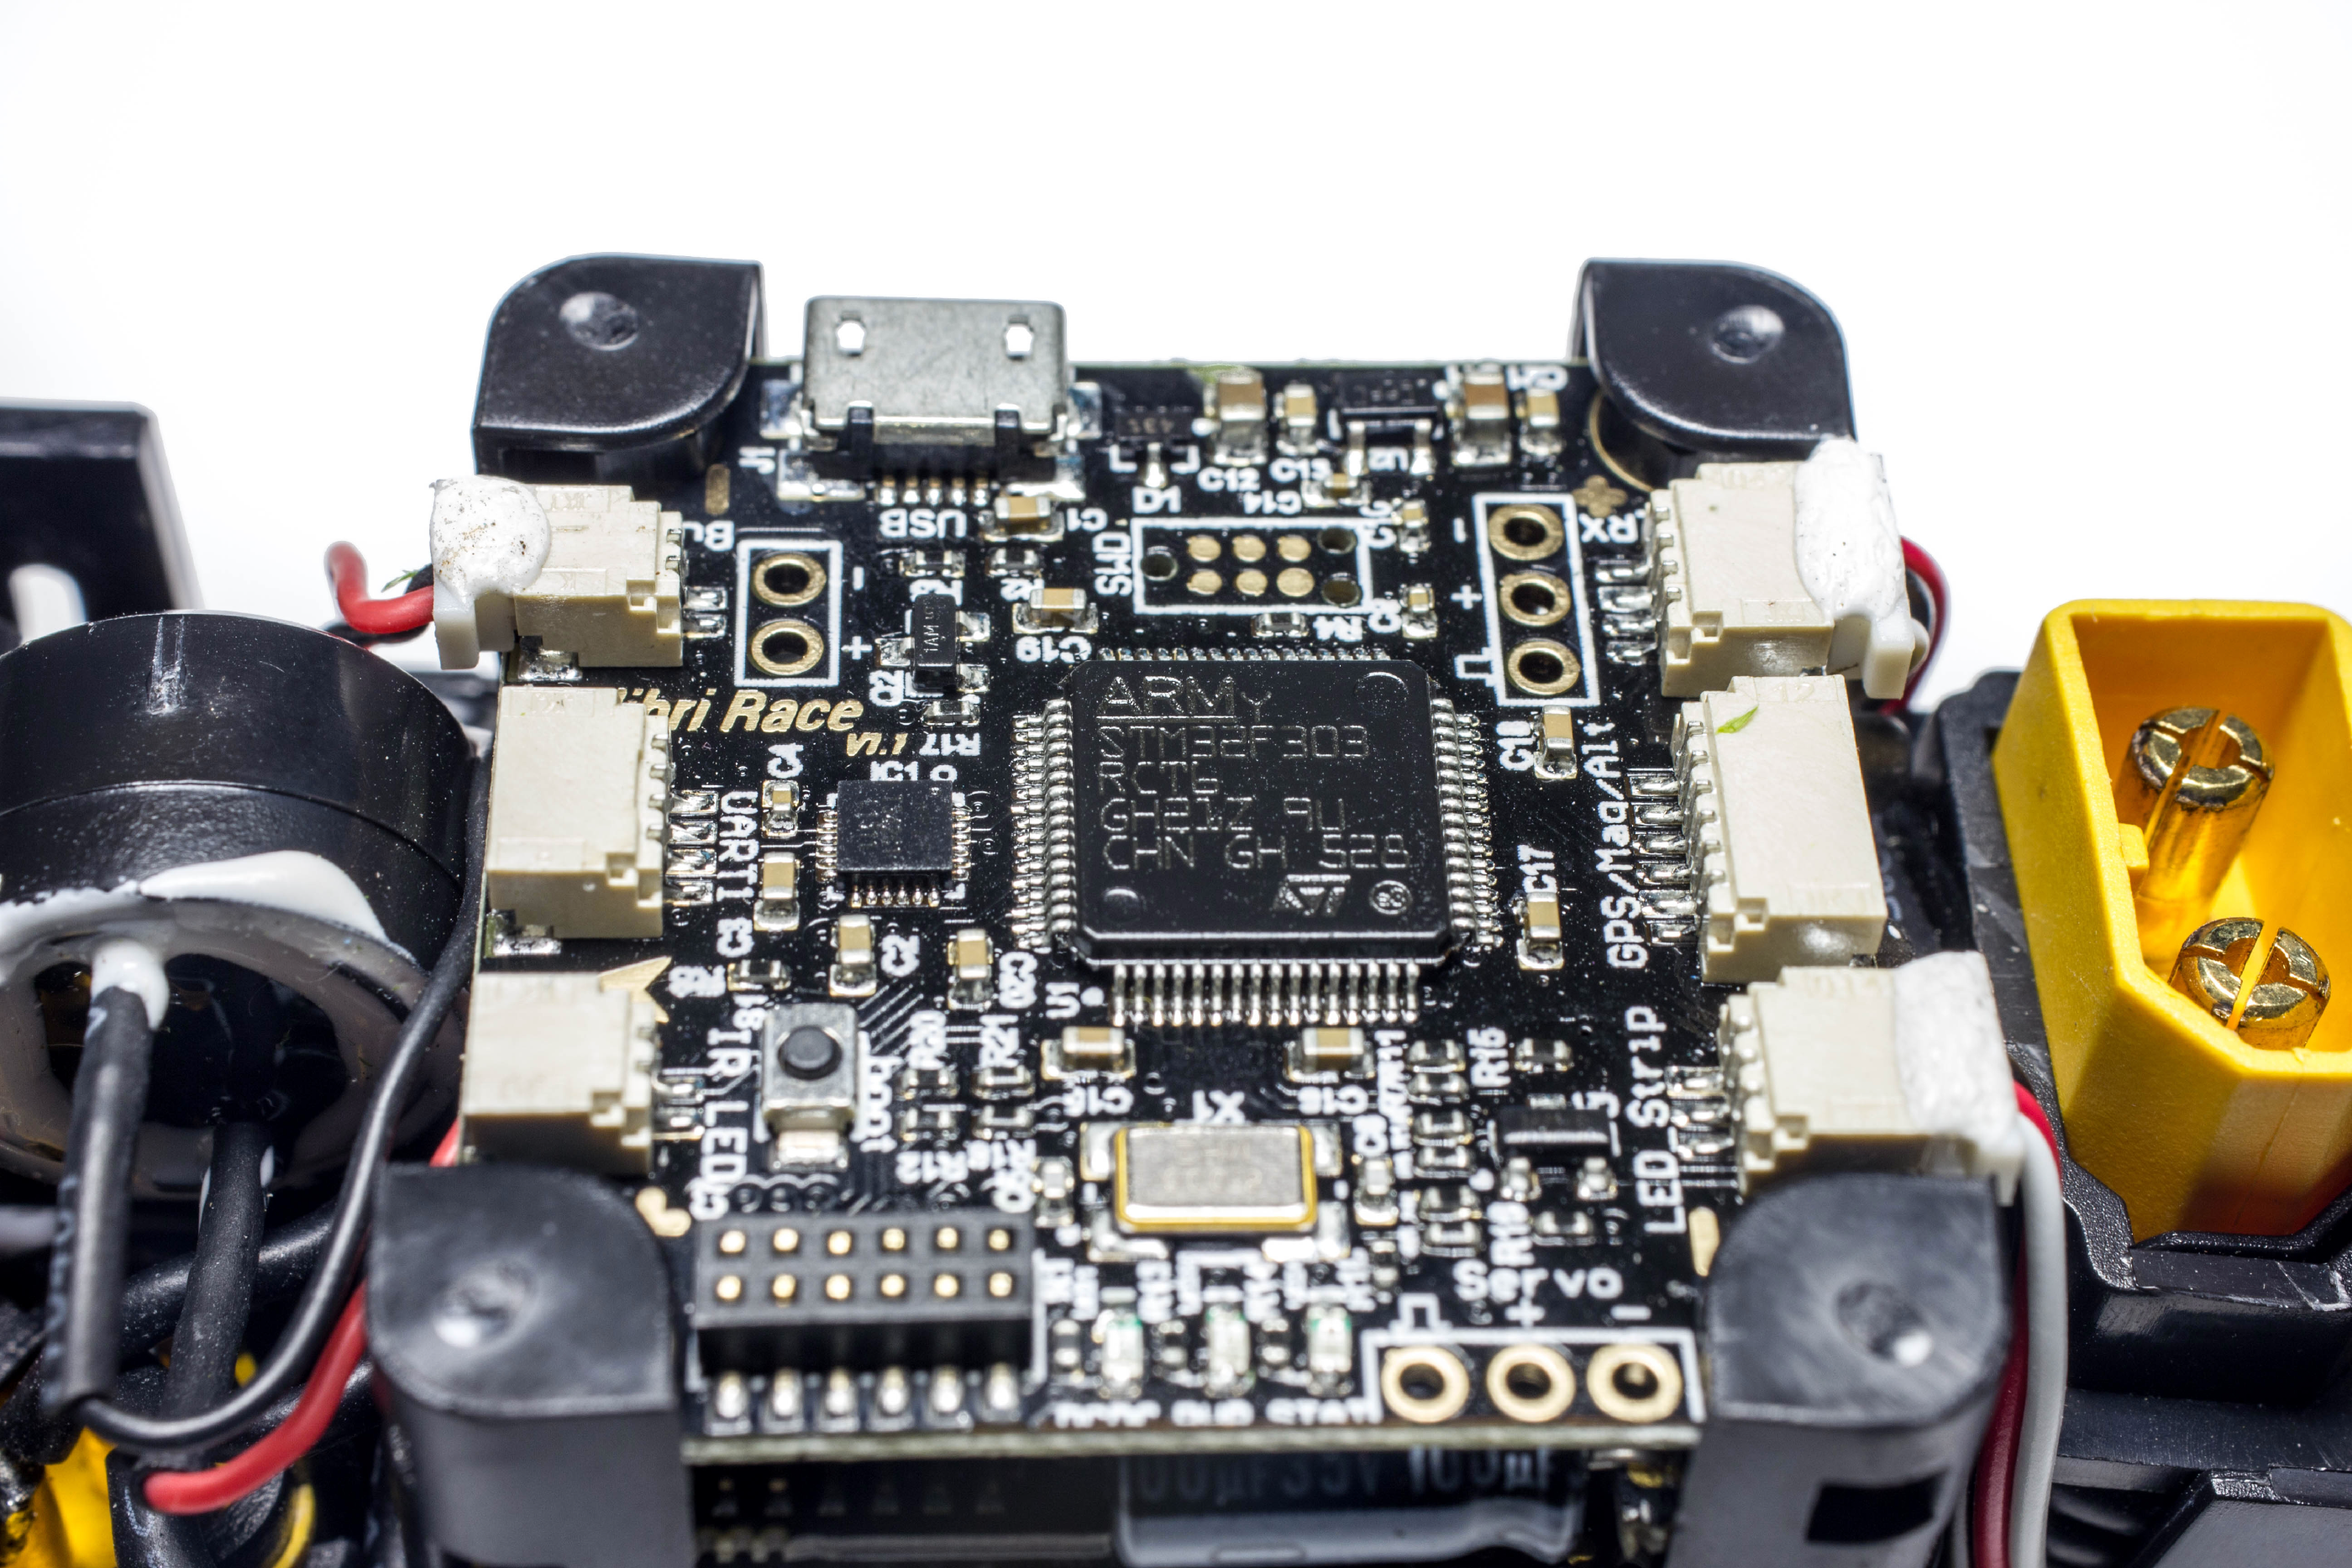
The TBS PowerCube is really the major hardware in this - a stack of 32x32mm seemingly complicated boards, which provide your motor ESC’s and of course the flight controller. I’ve heard great things of the PowerCube but never got to try one before so this will quite interesting. The hardware on this is up to date with current trends sporting 20 amp 2-6S capable ESC’s that will power even the craziest of prop and motor combinations. With a speedy F3-based flight controller on your favourite flavour of *Flight (Cleanflight, Betaflight), the combination should work great in the air.
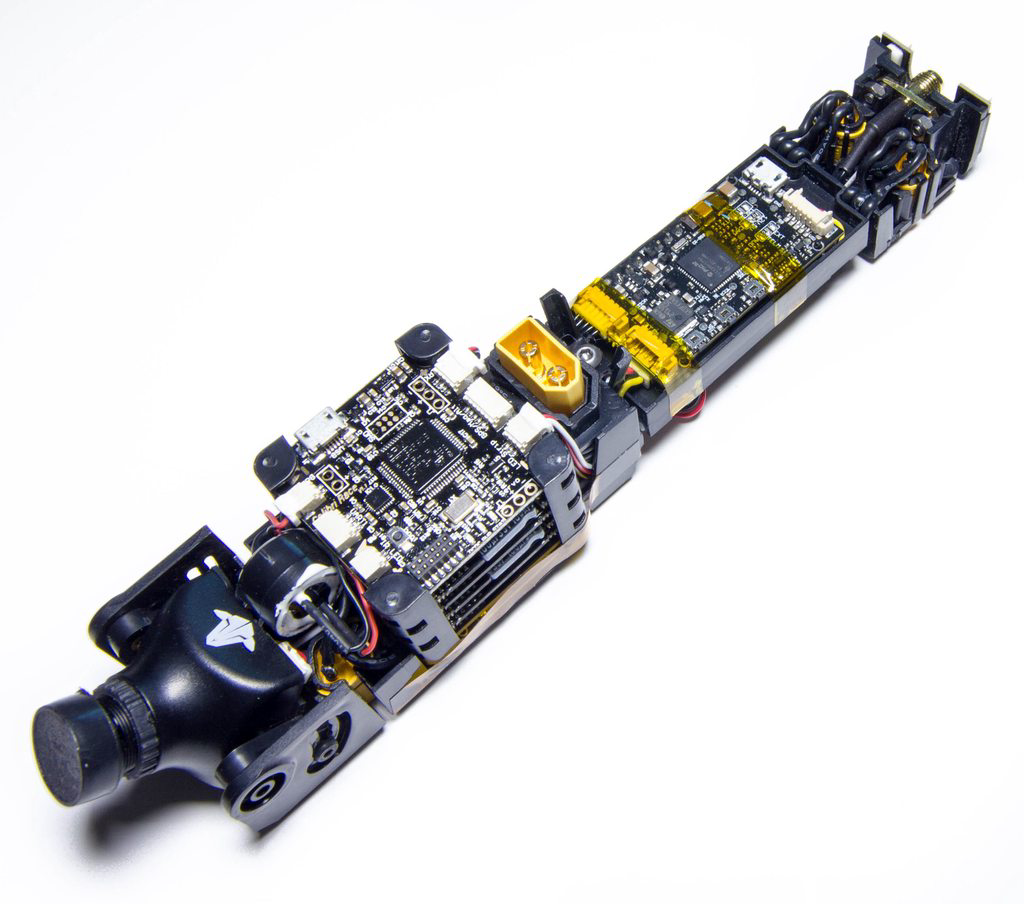
Towards the front of the pod now we’ve got our buzzer - this is nice and loud as I’ve tested it already, followed by the camera. The TBS ZeroZero is identical form-factor to the well renowned HS1177, but follows a little bit of criticism due to a lack of OSD and questionable default settings which do not perform that great, or what we’re used to. With that being said, it offers pretty much Zero latency (1ms) and has an in-built microphone for using audio with your FPV goggles, or recording it on your DVR footage. It’s also worth noting here that the OSD is accessible if you take the camera apart, so you can apply some “Fix” settings. I actually did this a few days ago to see that the fix settings had already been applied, so the likelihood is you will also not need to update anything, just use it as-is.
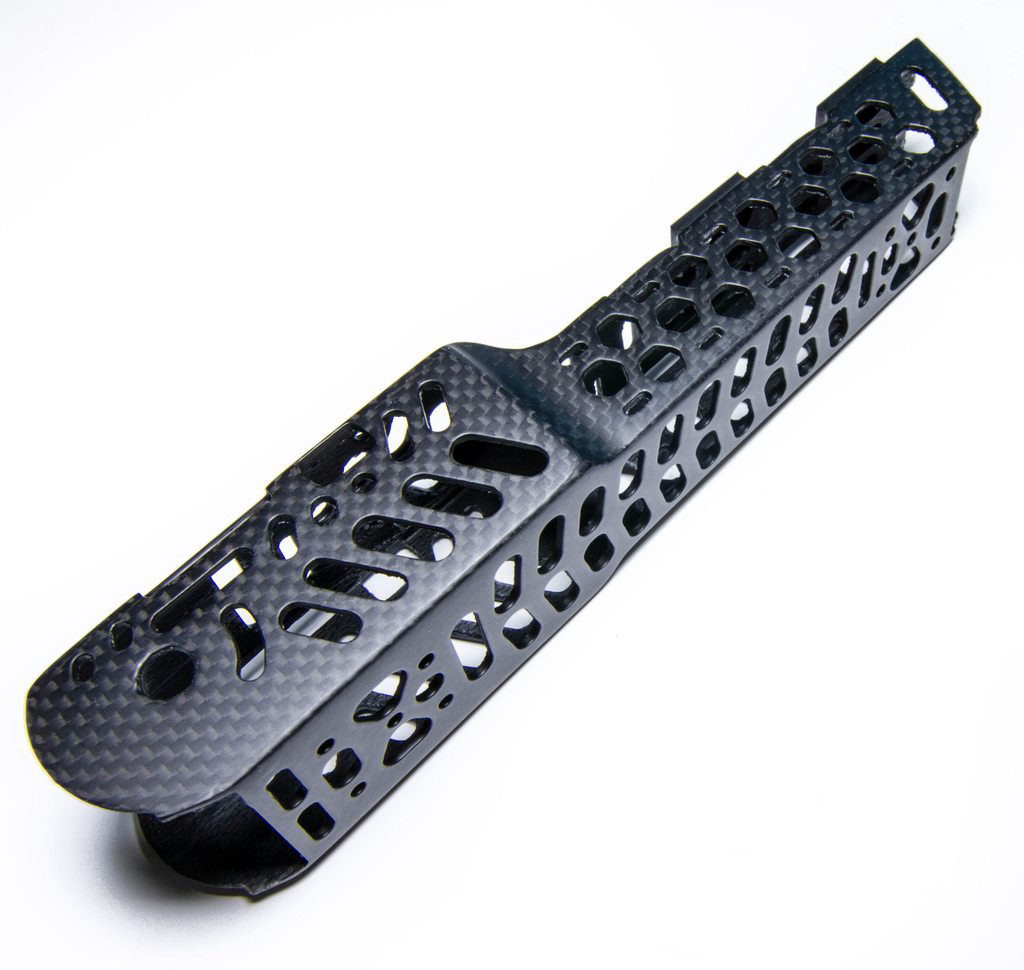
So that covers the whole stack that powers everything inside the Vendetta, a very neat and well thought-out setup. Here’s another shot of that lovely molded carbon.
Installing the Receiver
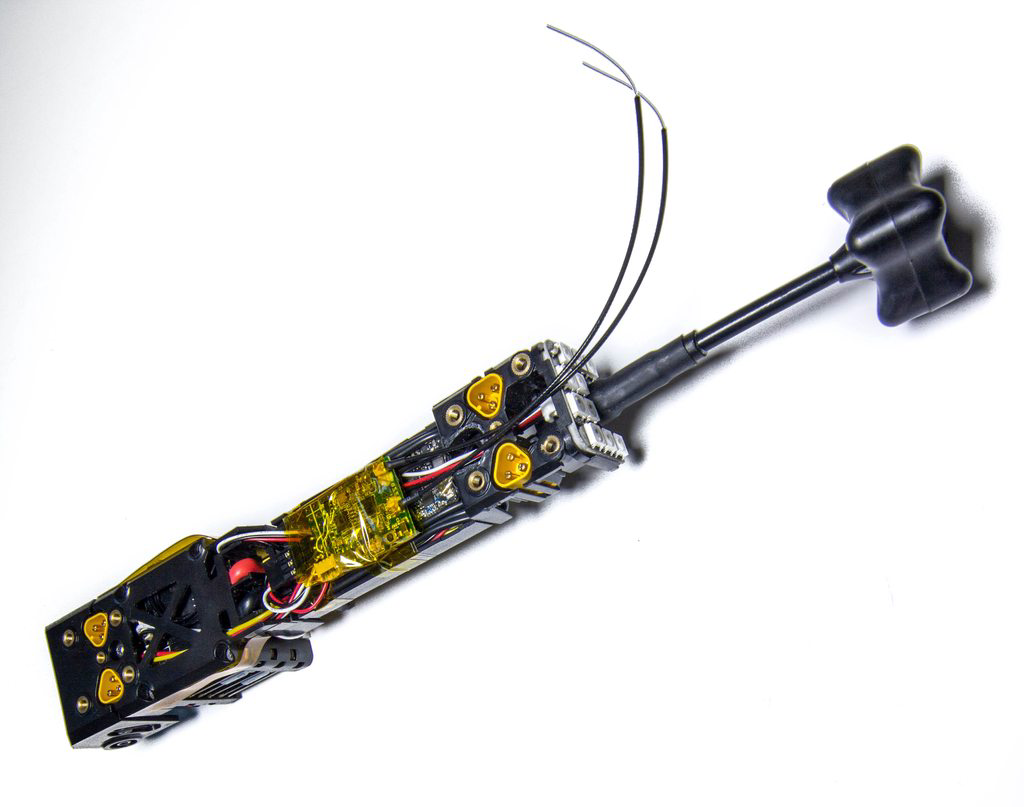
Underneath the pod we can see there’s a servo cable ready to attach our receiver. In this instance I’m using an X4R-SB as it’s a super reliable receiver combined with my FrSky Taranis. Once plugged in, I’ve secured the receiver to the pod using some Kapton Tape. You can see Kapton has been used quite a bit already so this matches up nicely to give it a stock feel.
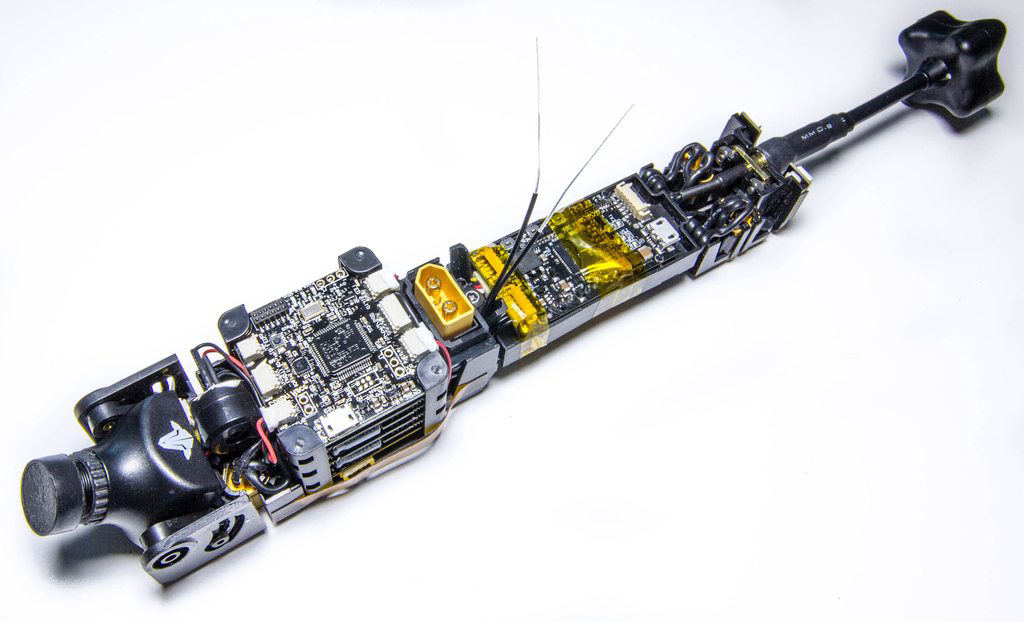
With the antennas installed my next question involved working out where the antennas were meant to go. Next to the XT60 are 2 small holes with some guides for the antennas, it’s not obvious at first but once you’ve seen them it is easy enough to put them through the holes. I have a bit of a large criticism here in that If you look closely you’ll see a V-shape next to the XT60 - the idea is that you run one antenna on one side, and the other on the other. Just below this mount on one side (the vacant side), is cabling for the camera going to the Core Pro, making it super difficult to get in. I did eventually manage to get the antenna through that hole (not pictured), but during testing I’ve found I get a lot of camera interference which I believe is due to this antenna. There were some “fix” videos listed on YouTube that said to simply switch the antennas around, because one of them transmits, and the other receives - so once switched you should have the receiving one by the camera which should not cause any RF noise. Sadly, this does not work. It also happens on only 80% of the flights, which is truly bizzare. Something that needs investigating.
If you need to bind your receiver to your transmitter, I highly recommend doing this now so you can access any buttons if you need to, but make sure to put your Triumph on - otherwise you have a risk of burning out the video transmitter.
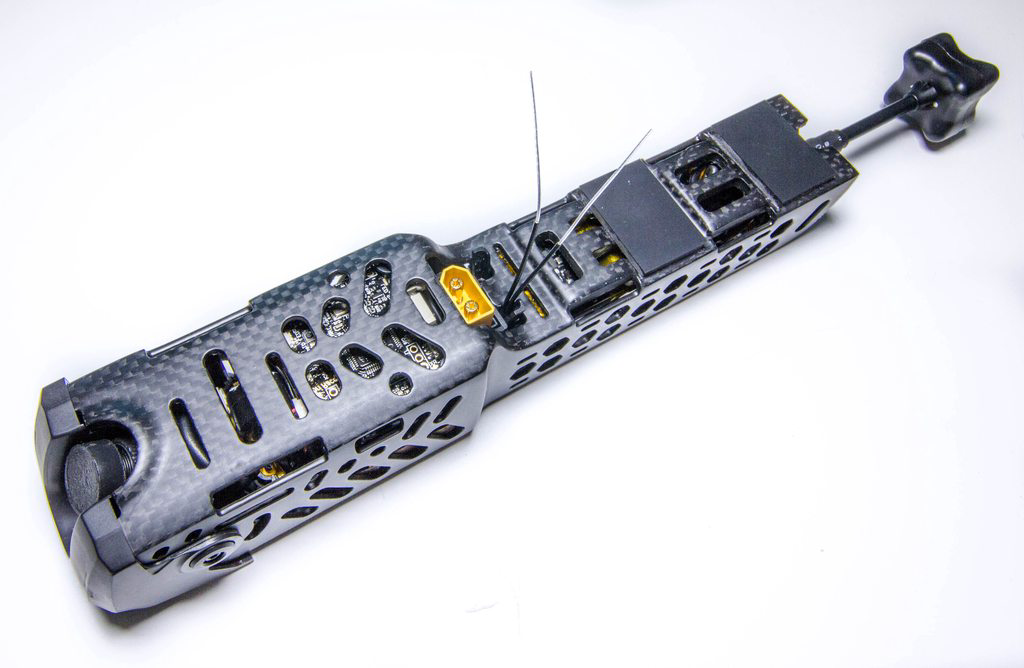
With the antennas installed we can slide the pod back into the body and re-attach the front fascia. We can also screw the Triumph on ready for connecting to the quadcopter.
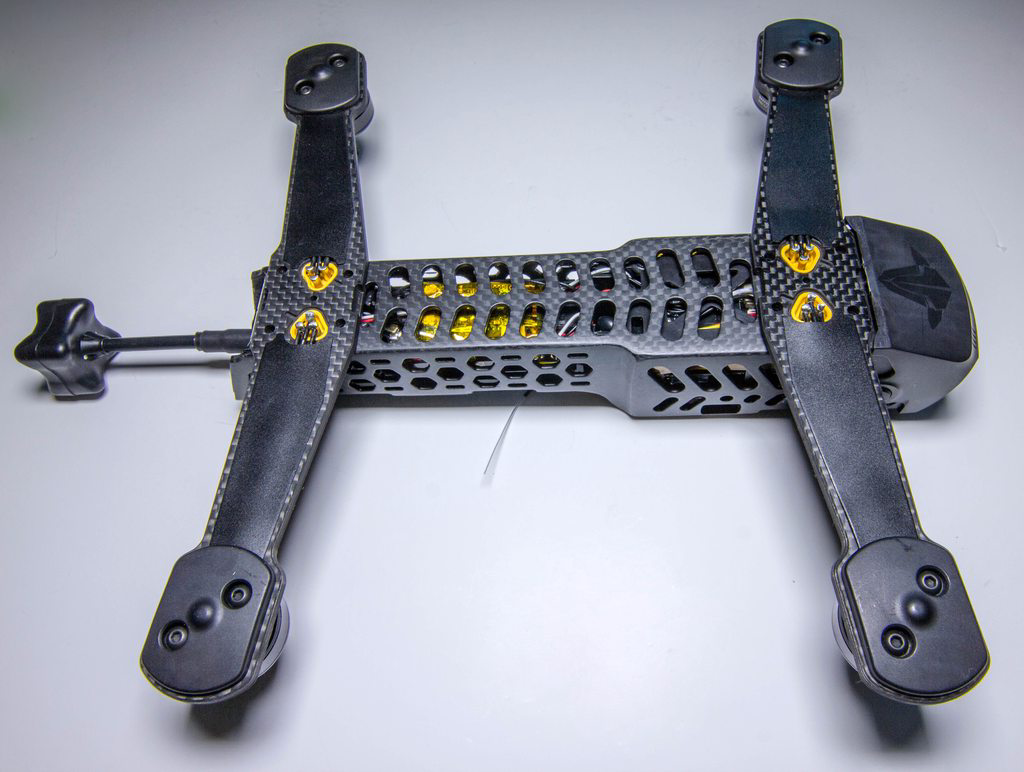
Once we’ve done that we can move on to installing the arms, these simply just push onto the body where the 3-way XT60-like connectors will push into the ones situated in the pod. You have to make sure you get the arm orientation the correct way - the flat sides should be pointing outwards. With these installed we can then screw the arms down. One thing I noticed here is the screws come with pre-applied loctite, this is a nice feature but don’t be alarmed if when screwing the arm in it appears to be tight, but it doesn’t feel screwed down. After a few times of doing this process the screws go in much easier, and it’s much more obvious when it’s actually tight. You’ll notice the screws will “pull” the pod down and onto the arms - don’t be alarmed at this, this is how it’s meant to be. This is what gives the frame its strength.
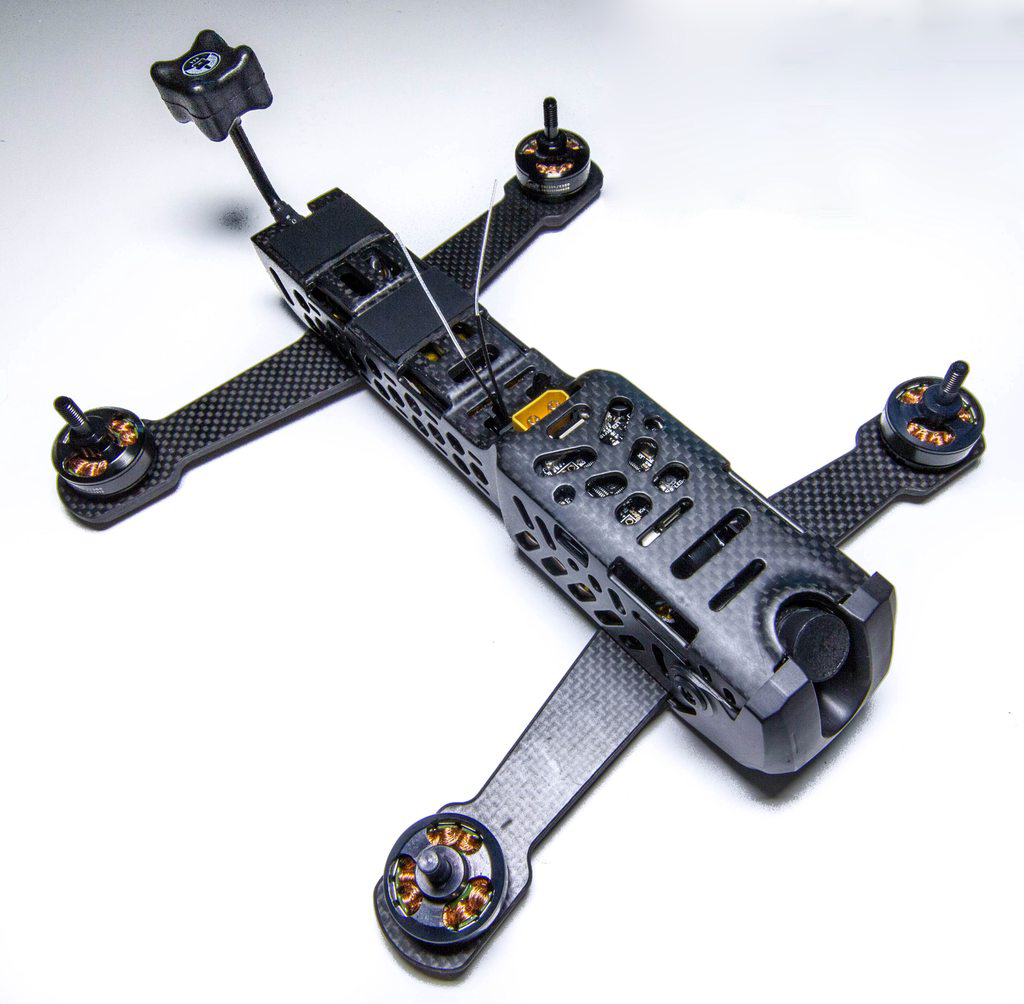
At this point the quad is bound to the transmitter and ready to setup. When you first tune into your quad through your goggles (BOSCAM A CH1), you will be presented with a quick setup menu that will go through calibrating your transmitter sticks to access the OSD and allow you to configure the items. I would recommend first plugging the quadcopter into your computer, powering up, and ensuring that your sticks are centered at 1500 as they should be (using TRIM), before you do the configuration. You will find that if you do this after you need to go through the configuration process again for the Core Pro, and the likelihood is you cannot actually access the OSD. A bit of googling found that you can use the buttons on the Core Pro to access the OSD and get to the calibration menu, but it wasn’t exactly obvious when I had done it - so something to bare in mind.
With that being said and the quadcopter ready for it’s first flight let’s move on!
In Stock Form
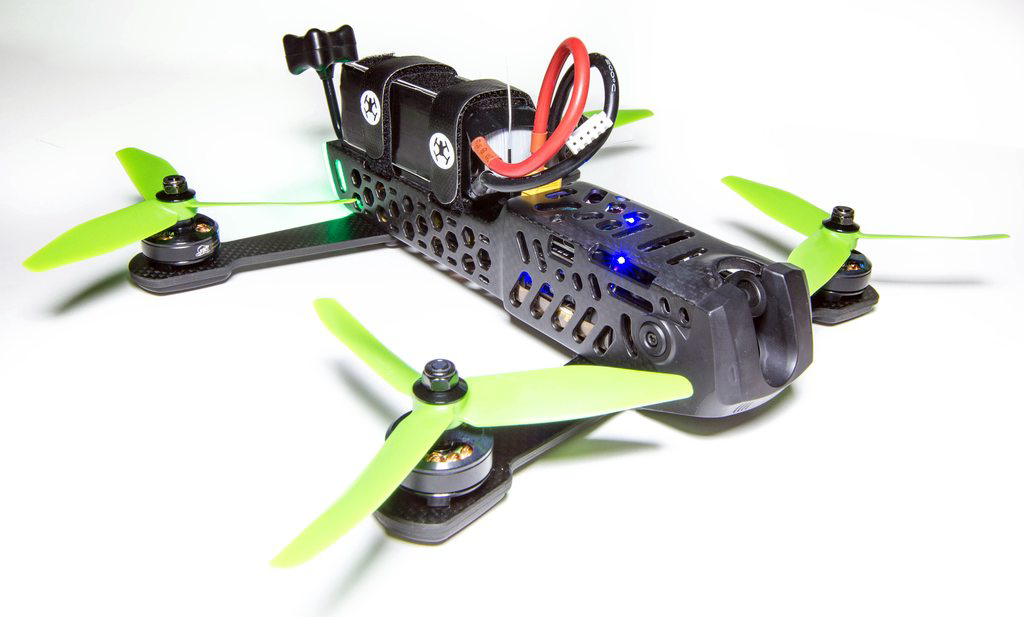
The next step once everything is configured (Cleanflight comes pre-configured out of the box), is to attach the propellers, battery straps and go fly! As mentioned earlier I did go into Cleanflight just to see what was configured already, and it seems everything is setup as you’d expect, with some pre-tuned PIDs and Rates. The default rates did seem extremely high, so I actually lowered them to what I’m used to (I know this is quite a personal preference).
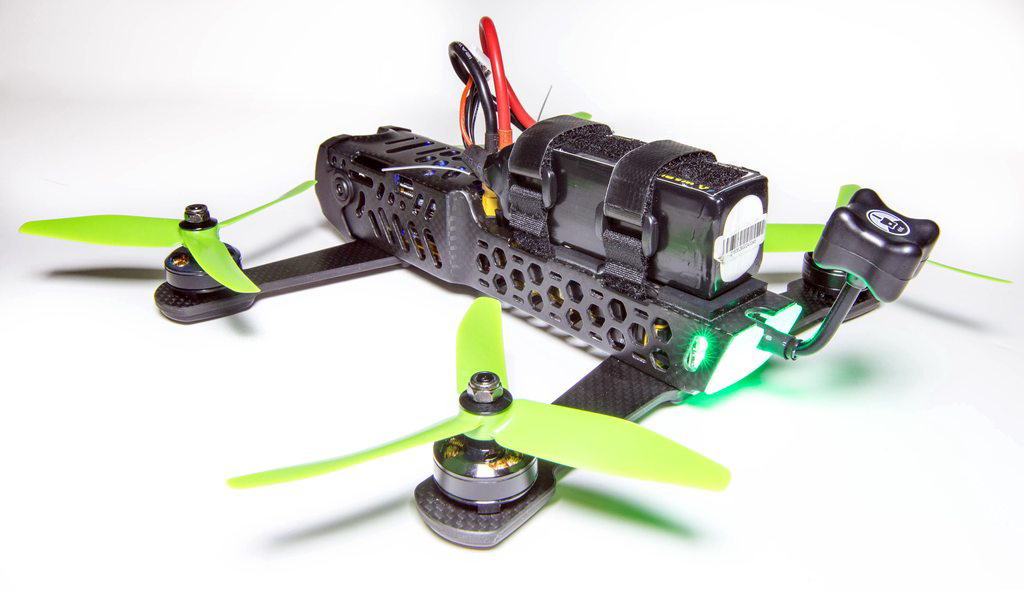
With the quad plugged in we can see the programmable rear LED’s being used - these change colour depending on which direction you are turning and how much throttle you use by default I believe. A nice addition.
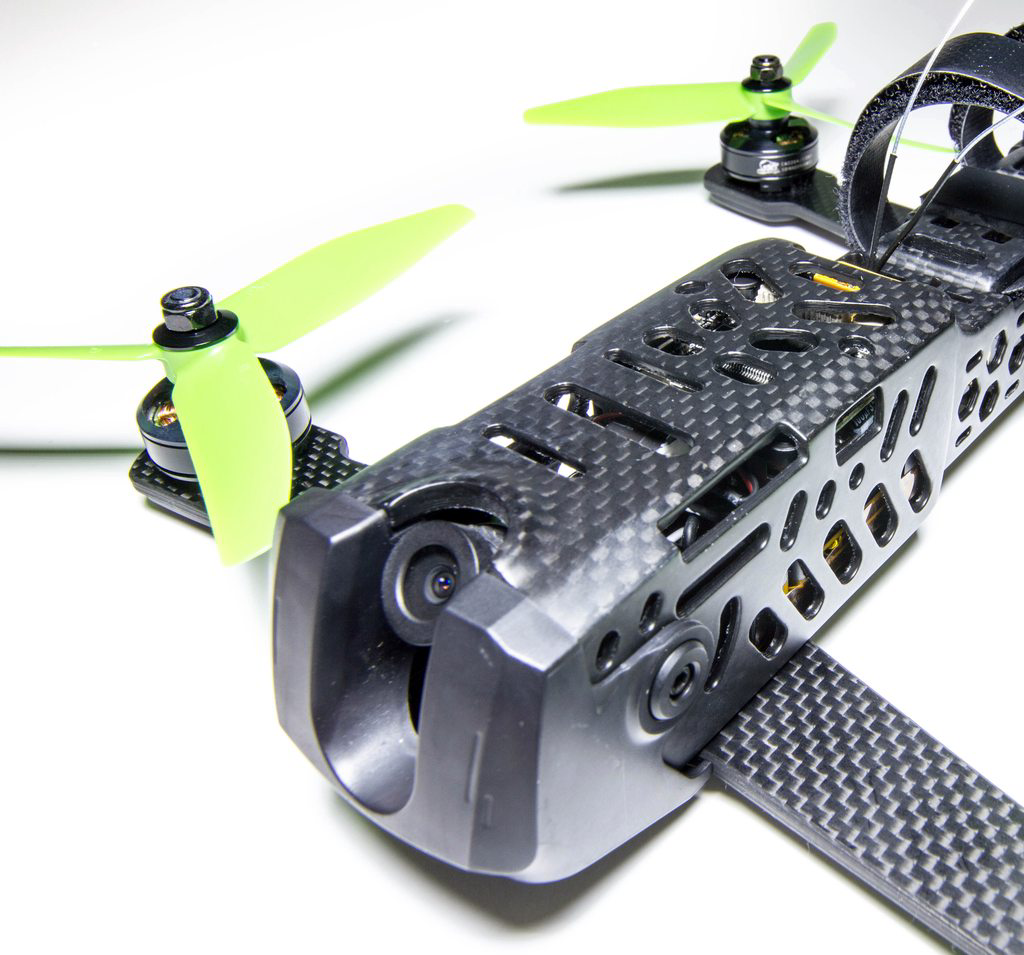
Depending on your flying style you will want to adjust the camera angle as you require. Personally I run around 45 degrees camera angle, so this is what I’ve set it to ready for it’s maiden.
Flying
I received the quad on Friday afternoon, set it up that evening and went down to my local (ish) club to fly with some friends the next day - a perfect time to maiden it.
As you can see from the video it flies! The first half of the video was I think the third flight with the frame after I’d adjusted my rates some more. This was on completely stock PIDs which felt ok, but lacking in some areas. I would say for me personally on the stock HQProp 5x4x3 propellers it felt like it lacked a little power due to the weight, but this is really negligible because I am really not the right market for it. This was mainly when flying with a GoPro which adds even more weight, without the GoPro it was a lot more nimble in the air.
With that being said, it just worked out of the box and it actually flew pretty nicely. The OSD with all of the configuration items is a nice touch, and makes adjusting everything very easy. At one point I had forgotten I could configure it via my goggles and transmitter and plugged it into my phone as I normally do with my other quads!
I know there’s been quite a few reports of the arms breaking towards where the motor is due to a slight weakness there - for me I’ve had no issues but I didn’t really crash all that much so far - with that being said I think they are bringing out a revision to the arms to combat this, so once that is out it should be much more durable.
Slight Changes…
With the quad flying nice as stock, but lacking a little I wanted to see if I could improve it any further. I started by updating to the latest version of Betaflight (2.7.1) and switching out the propellers to something with a little more thrust - HQProp 5x4.6x3 Durables. I’m currently using these on all my other quads as they have great amounts of power while being nearly as durable as the DAL’s.
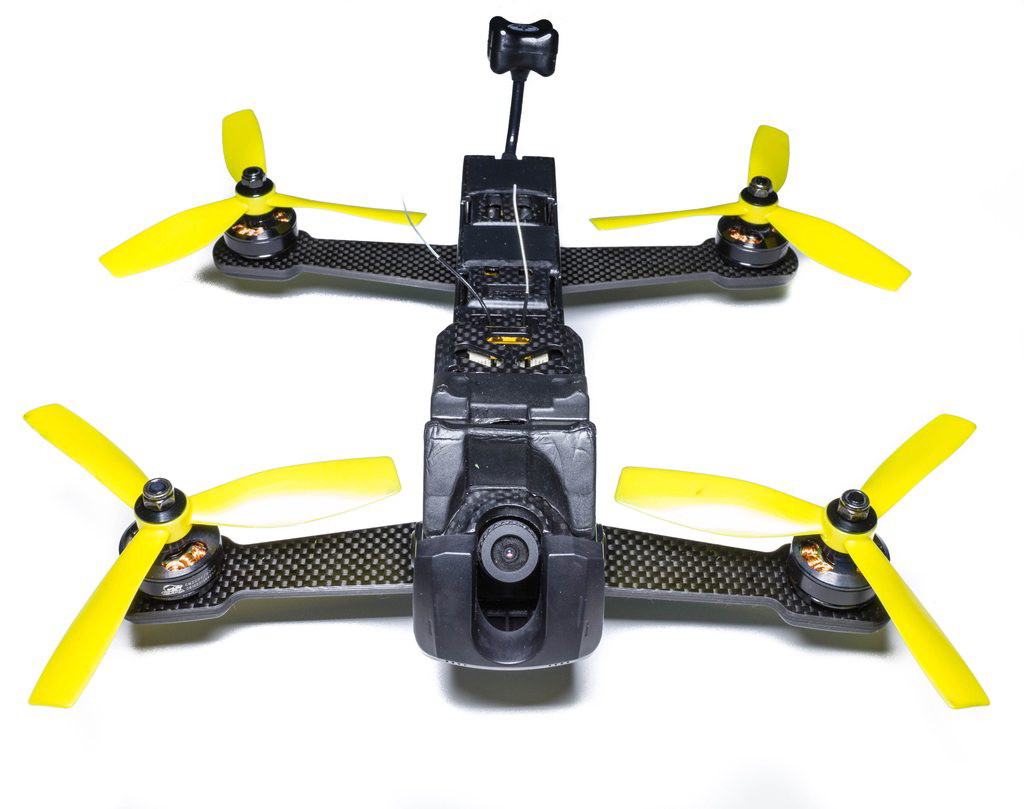
As you’ll see from the second-half of the video it seemed to fly very much more locked in, with more power - there were some wobbles on harsh turns but this is down to my quick tuning and could easily be solved focusing more on getting those PIDs nailed. With that being said, it flew much better on this combination and more like the other quads I’m used to - the extra power and stability was great.
It’s also worth noting I also tend to fly with AirMode permanently on regardless of my quads - something which the pre-installed version of Cleanflight does not have. This was very interesting when trying some quick freestyle, dropping all power for inverted hang-time would pretty much force the quad into a bit of a tumble, despite having the default configuration set to “idle” the propellers on arm.
Final Thoughts
So how did I find it despite some of the issues, setbacks, and of course flying? Well, actually it was quite a breath of fresh air. If I had come into the mini quad world now rather than 2 years ago, we are blessed with what is around today. If you are looking at getting an RTF quad to start off in this awesome hobby then a Vendetta or the alternative (ImmersionRC Vortex) would be great choices, and I’d find it hard to argue against either. People will always sway towards building your own so you get to learn the nitty gritty from the get go, but actually I think these are built to a standard where you will be a while away from having such a severe crash that you need to do anything to it. The fact it works so well out of the box is testament to the product development behind it, and while I’m not sure the stock rates are particularly newbie friendly (they’re way too high), the tune is adequate and being able to configure everything they require via the OSD is great and takes away from perhaps a daunting experience of plugging it into the computer and being presented with hundreds of settings, inputs and options. With that being said, it’s not surprise it won’t be my “go-to” quad for my usual flying, for me it’s a little on the heavy side and has quite a large drag profile when in fast forward flight. I am very very tempted to switch out the motors to some Emax RS2205 or ZMX 2206, just to see how it livens it up, but we’ll see further down the line. Also, as you’re probably aware technology in this hobby changes all the time (sometimes every week) - I am one of those people who likes to test the latest and greatest to get my own opinion on whether it’s a good improvement or not, or whether it’s just a hype train that will derail in a month. So for that reason I think I’d find it difficult to lock myself into some very specific hardware (you could modify it to suit but it’s not as straight forward as building a quad from scratch).
There’s the few teething issues I spoke about earlier, but as long as some basic research is done (which should be a requirement anyway let’s face it), then it should be a smooth sailing process to get it up in the air quickly and have some great fun flying a quad! I hope the review has been of some use to people, I intend to keep experimenting with it to find what sort of improvements I can do. For now, it’s going to be a fun quad I can use to show friends what they can get into, without so much of a worry of smashing up my race season quads. It’s also a perfect quad to do this because it’s one of the ones I’d recommend them getting.. :)
You can see the full image gallery here.