Reviews
Falcon Multirotors Bannilite - Build Log & Review!
Posted on April 11, 2018 • 15 min read • 3,160 words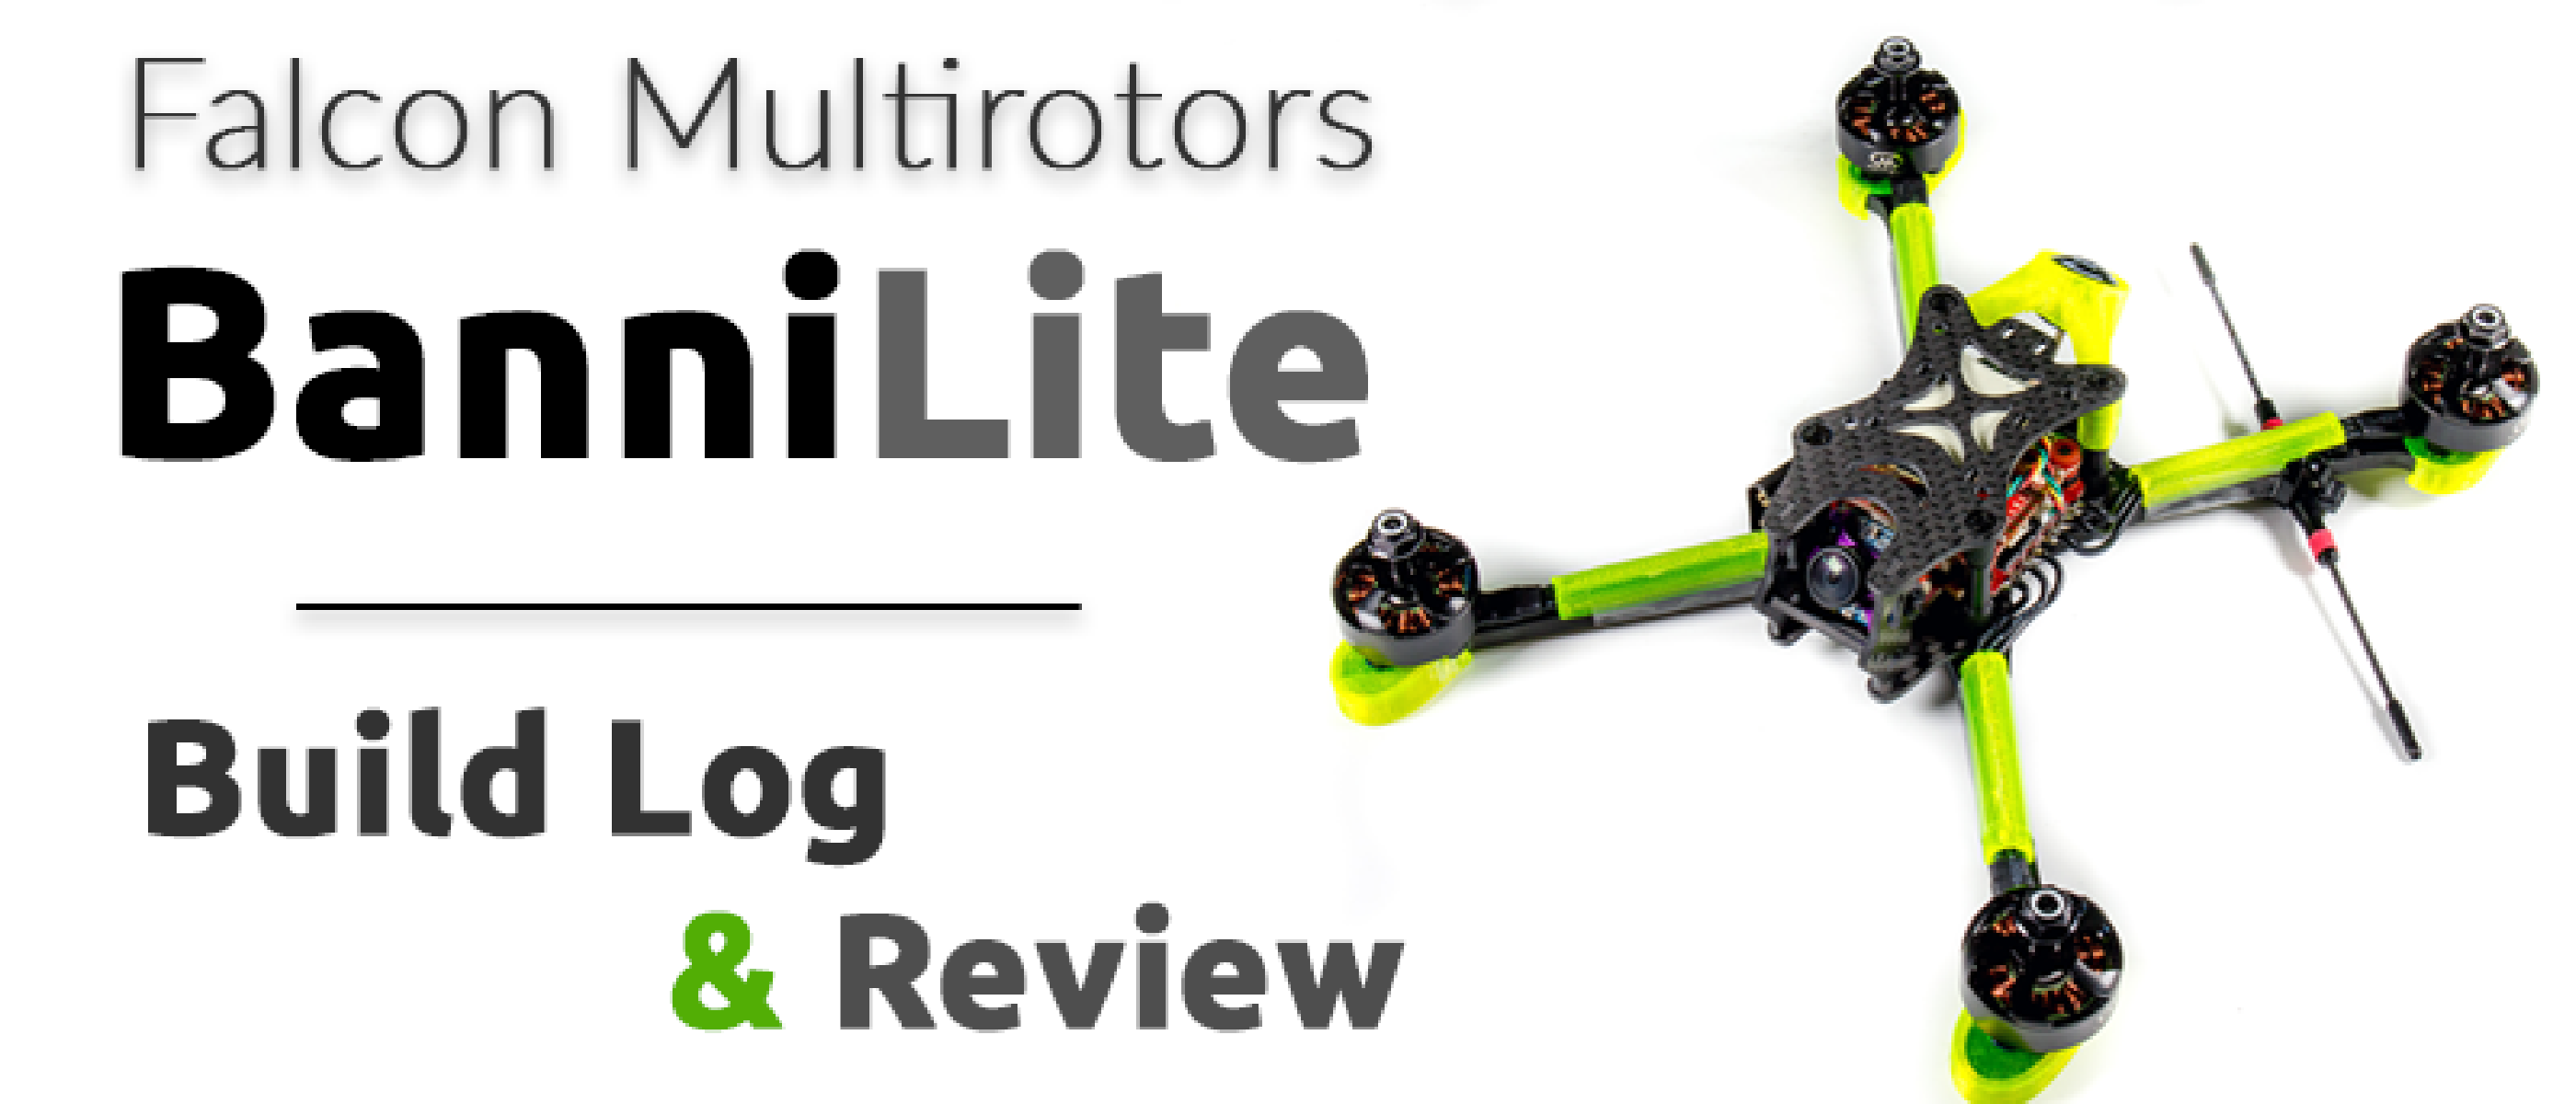
The Bannilite is available direct from FalconMultirotors (US), FPVHQ (US), PiroFlipRC (US), RaceDayQuads (US), GetFPV (US), Quadcopters.co.uk (UK), Airjacker (UK) and MakeItBuildIt.co.uk (UK) at the time of posting for $65 or £54.99 equivalent.
Larry Davis of Falcon Multirotors has always made great frames, I have a couple of the Featherlight’s myself - super light but practical Stretch X 5" racing frames. I’ve never broke anything on either of the builds, and so for me that is an immediate good sign. So when I heard Luke was going to be doing a frame with Larry (actually I helped hook them up but shh.. :) ), I knew it had all the chance in the world of being a great frame. Larry has huge frame design experience with a whole host of different frames under his belt, and Luke is one of the fastest pilots in the world, and knows exactly what he wants - so together the theory is an unbeatable frame!
Both of them were kind enough to agree to a review and so here we are, this will cover my initial unboxing, a full build with what I intend to race with this year, followed by some flight footage and my overall thoughts of the frame.
The Bannilite is available direct and also via many of the other international stockists also shown on the page.
Product Description
Straight from the website here’s what the manufacturer has to say:
-
Designed by BanniUK - We collaborated on every aspect of this frame with Luke Bannister, AKA BanniUK. Luke had some very specific requirements, tweaks, and goals, and this frame implements all of them.
-
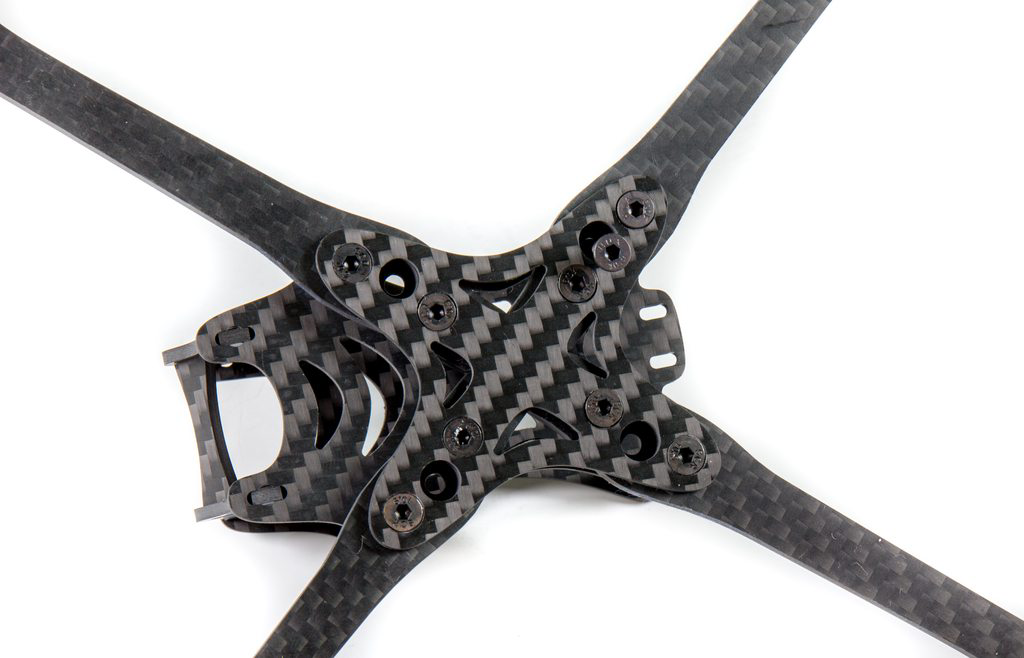
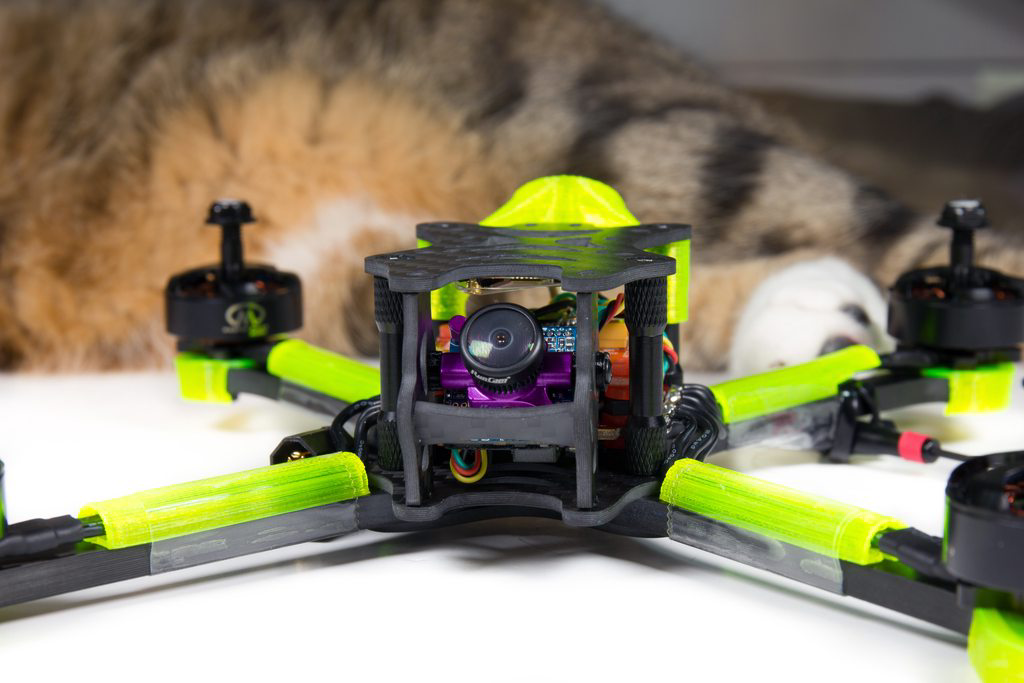
Ultimate Camera protection - When we say camera protection, we mean it. Even a full-on face-first metal gate hit directly in the middle of the frame results in impact only against the horizontal camera brace or camera plates, with TPU camera mount that can tear away instead of damaging the camera if anything is dislodged. The last thing you need to be doing between heats is swapping a camera, and Bannilite makes it so you don’t have to.
-
Supports all of Banni’s favorite components. - Gemfan 5.1" props, TMotor 2207+ motors, the Hobbywing 4in1 stack, RunCam Swift Micro, TBS Unify, and the TBS Micro Crossfire reciever all fit comfortably on the frame, with no compromises or clever tricks required.
-
Swap arms without perturbing your stack. - If you manage to break one of its durable 5mm arms, Bannilite makes it simple to swap it out with 2 screws, all without getting in the way of your stack.
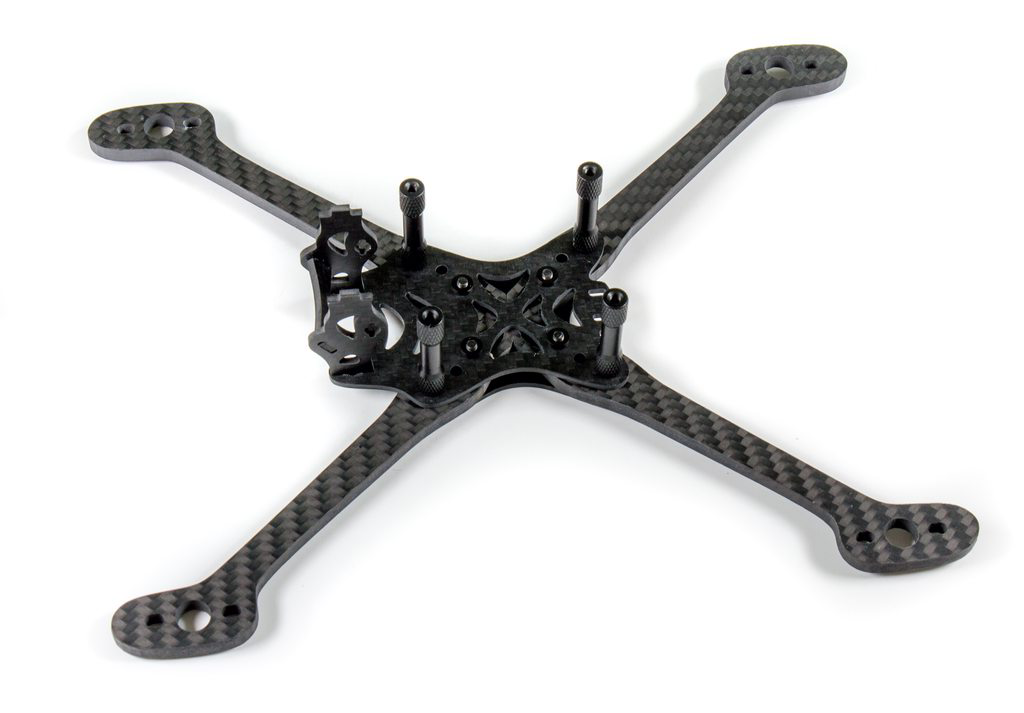
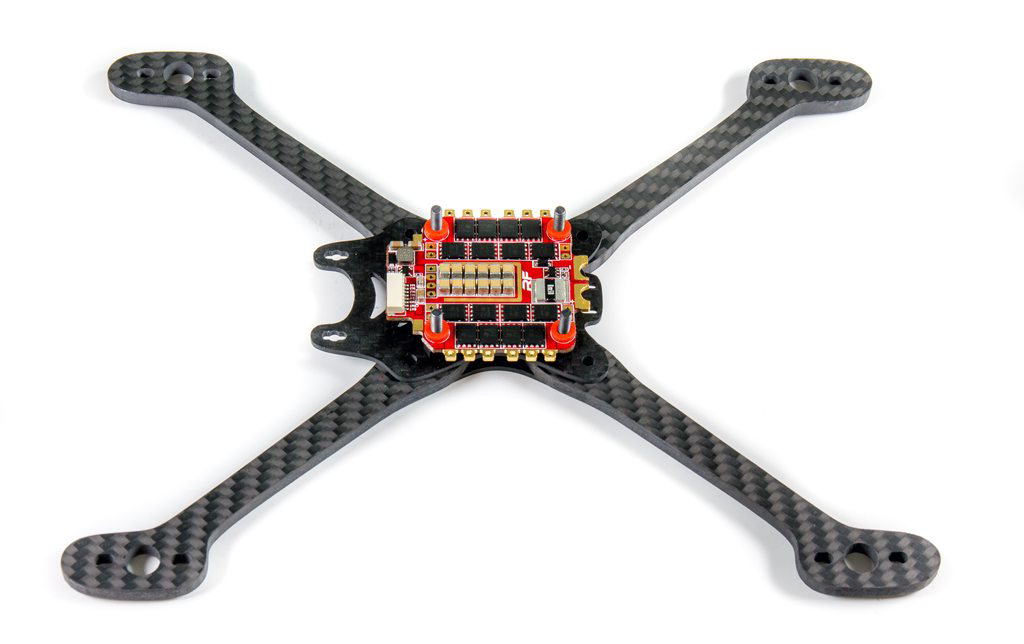
Vitals
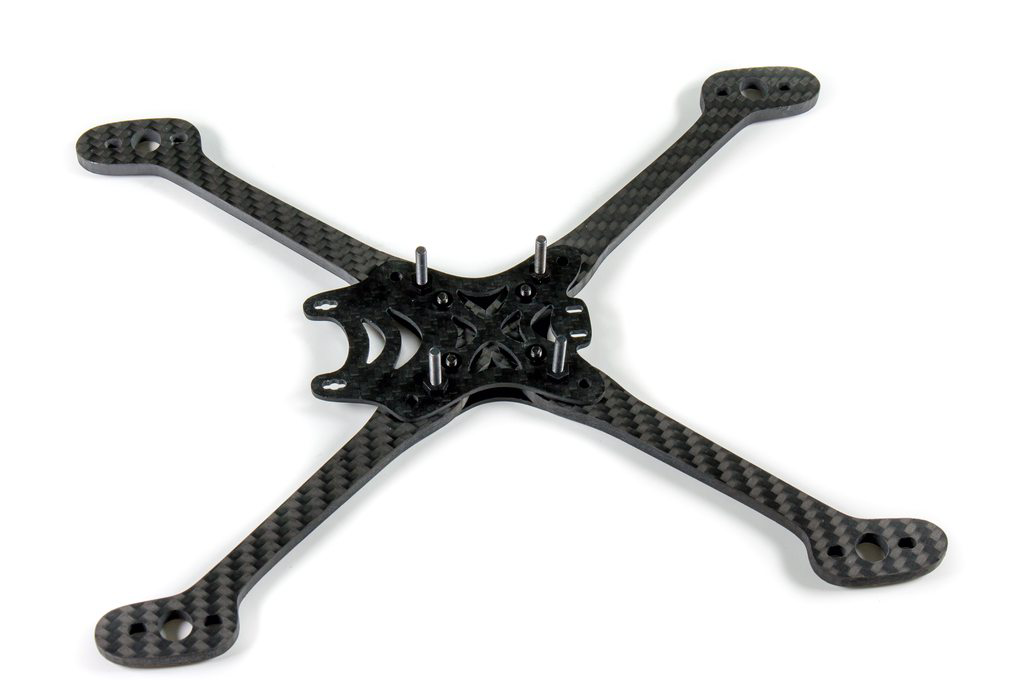
- 220mm motor to motor slight Stretch-X layout
- 5" propellers
- 72g all up weight
- 5mm thick, 9.75mm wide arms
- 30mm stack with support for 30x30 or 20x20 stacks.
What’s in the package
So let’s get on with the unboxing. Now I must reinforce here that while the packaging is not all that fancy, the frame is priced accordingly in my opinion, at $65 (£54.95 respectively), it packs a lot of features in a small footprint, and doesn’t waste any costs or material on stuff that is not required.
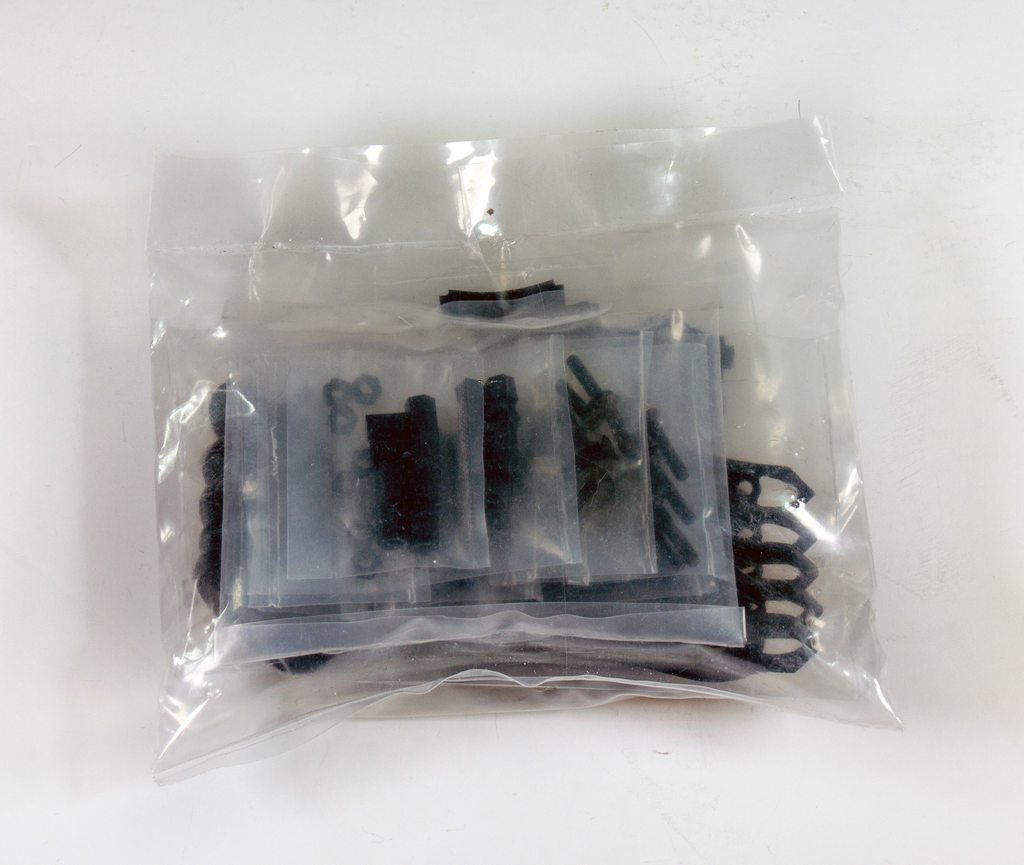
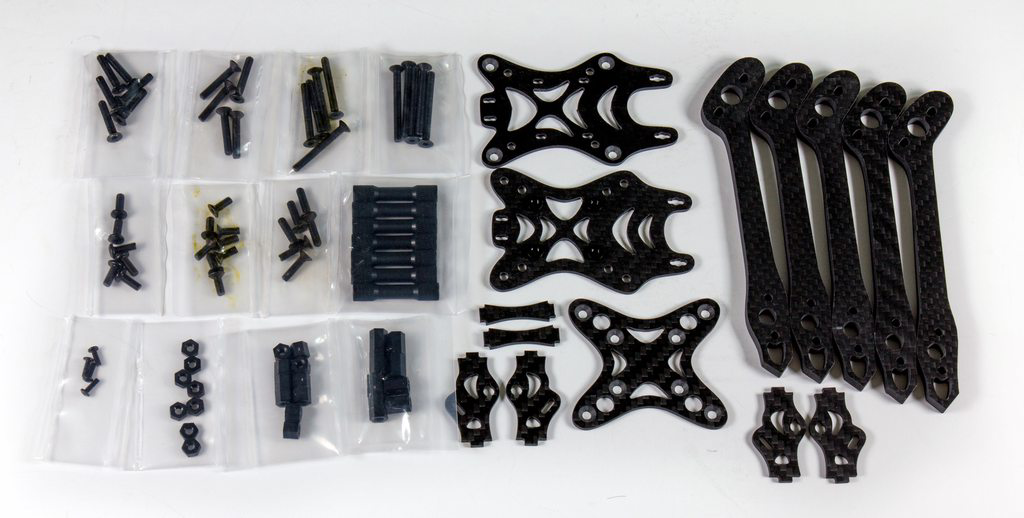
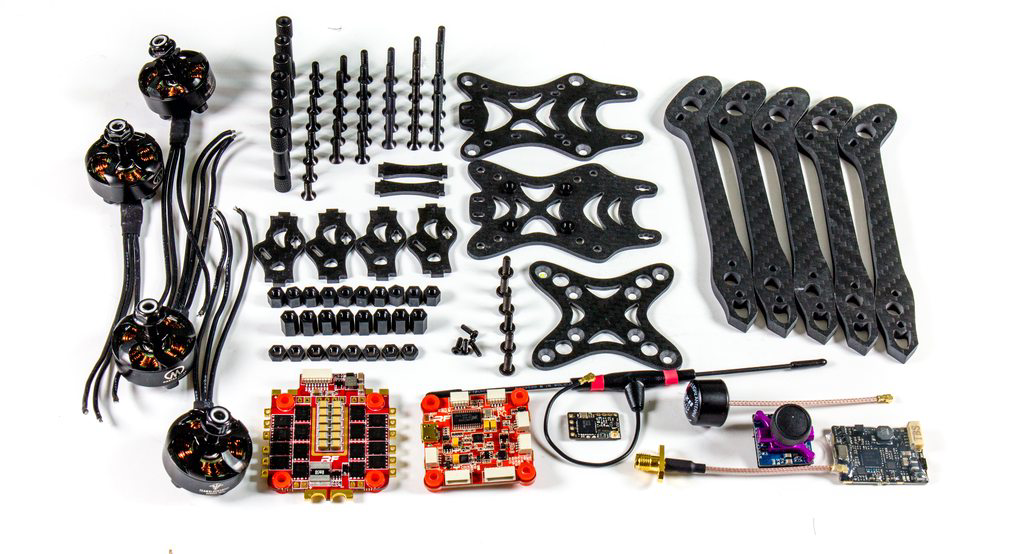
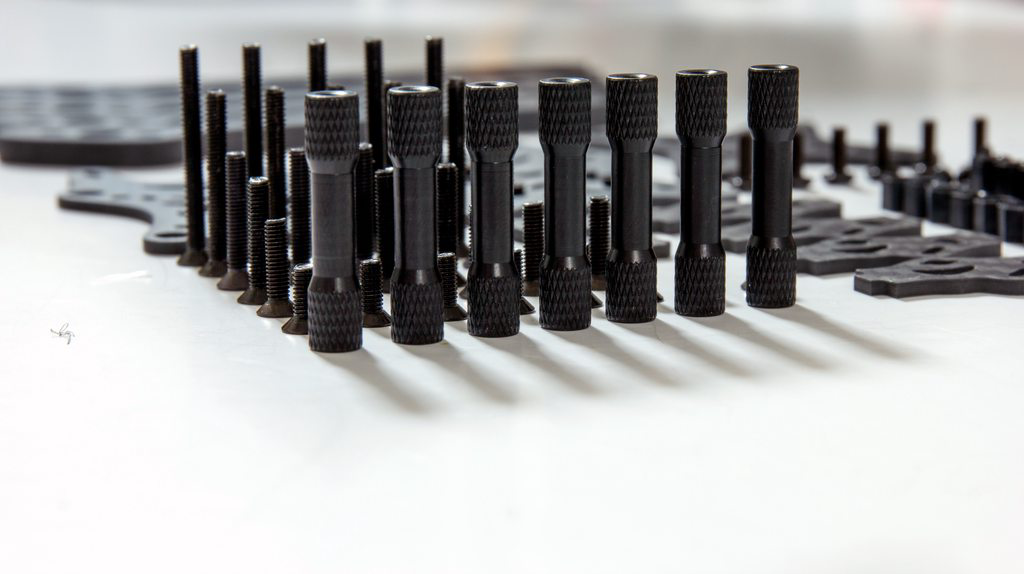
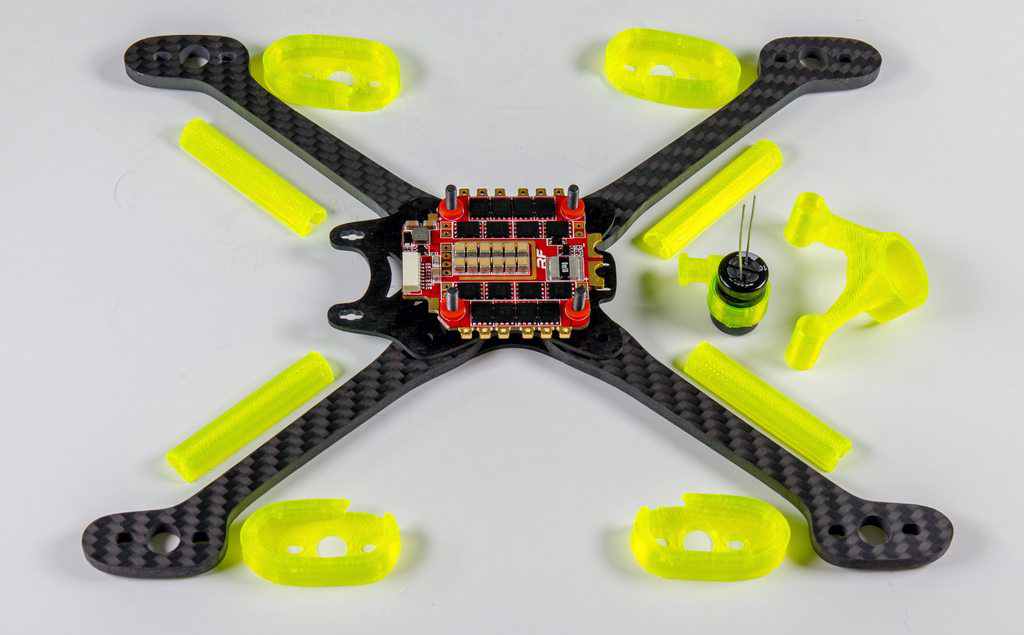
So we have a big bag full of stuff! There looks to definitely be extras in here.
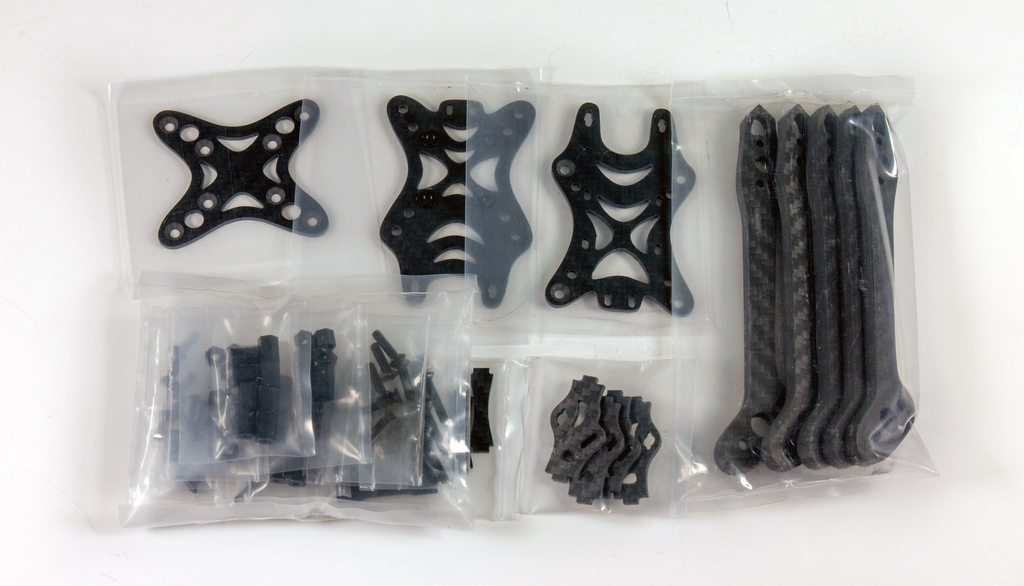
Inside the main bag, every main part of carbon is individually wrapped also and separated into the different parts.
With all of the carbon unpacked we can see there’s 2 vertical spare camera plates, as well as a spare horizontal camera plate. And of course if you hadn’t guessed, a spare arm too!
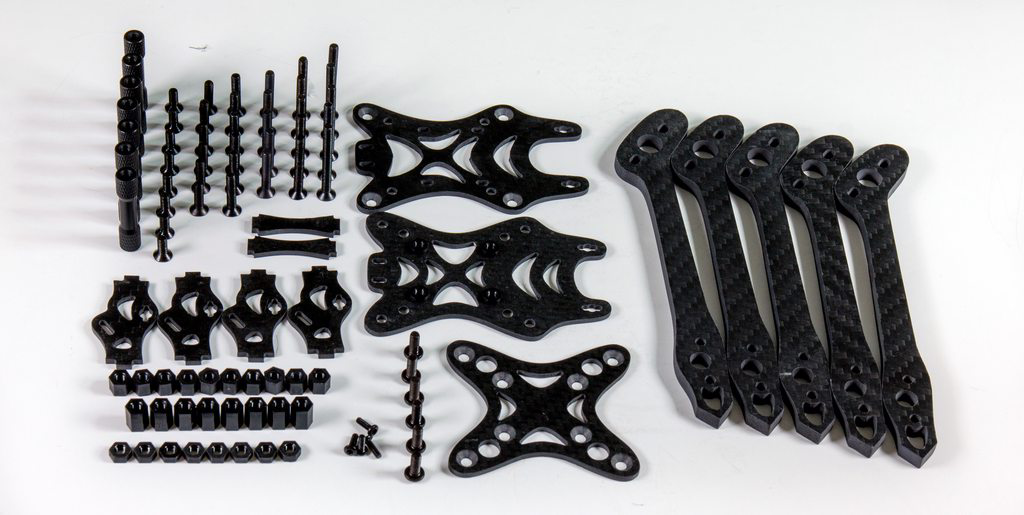
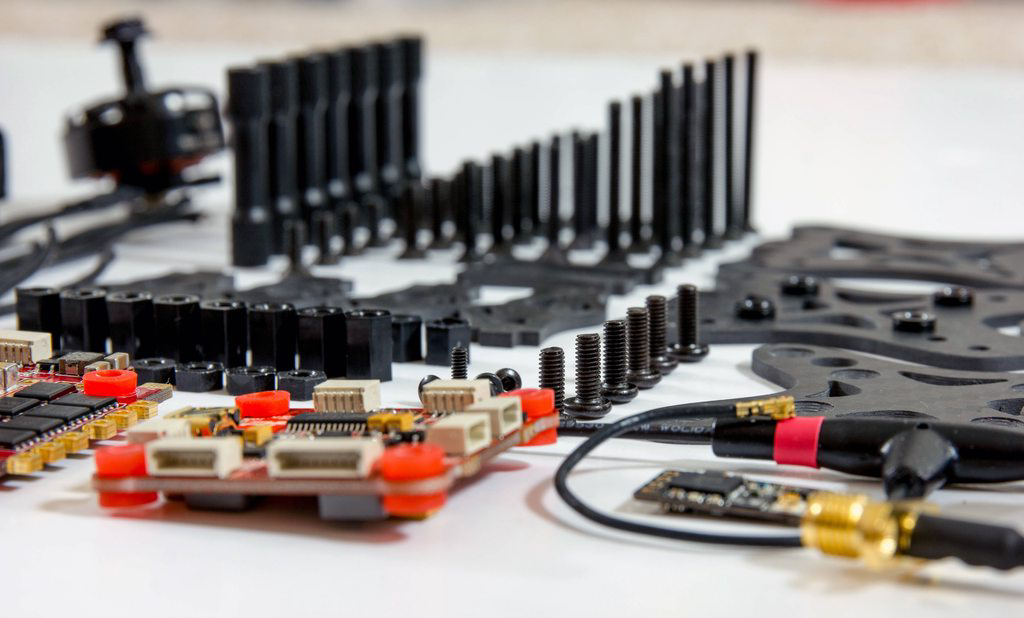
How do we possibly use all of that nylon and steel hardware? The answer is you don’t have to - the Bannilite comes with screws of various lengths to suit every single build, as well as providing spares alongside that too. You’ll also notice there’s spare standoffs and double the nylon parts required too.
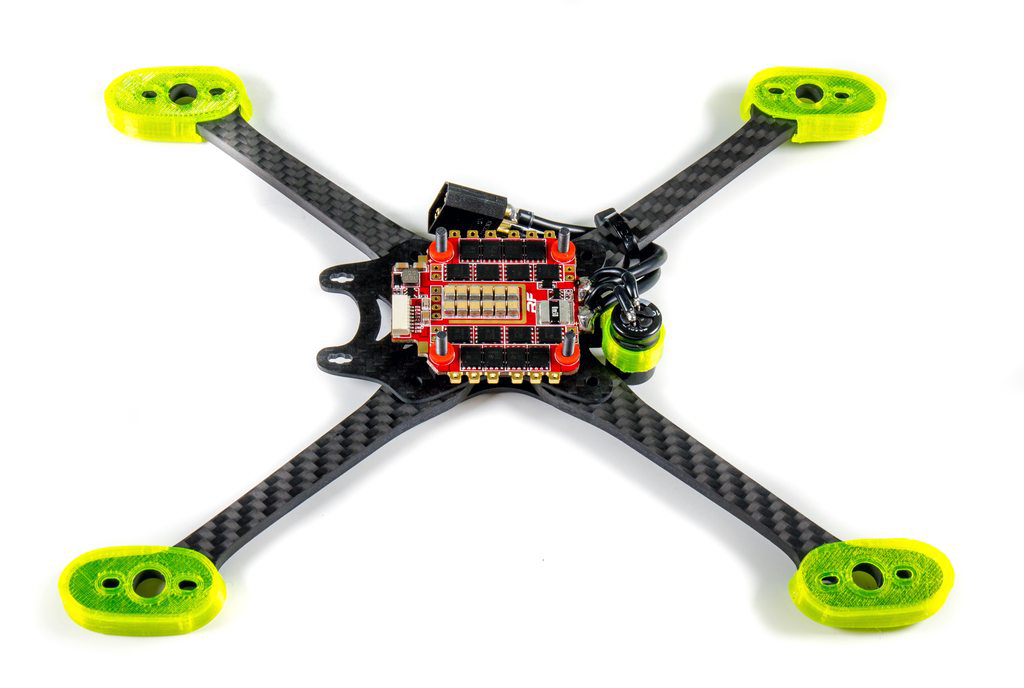
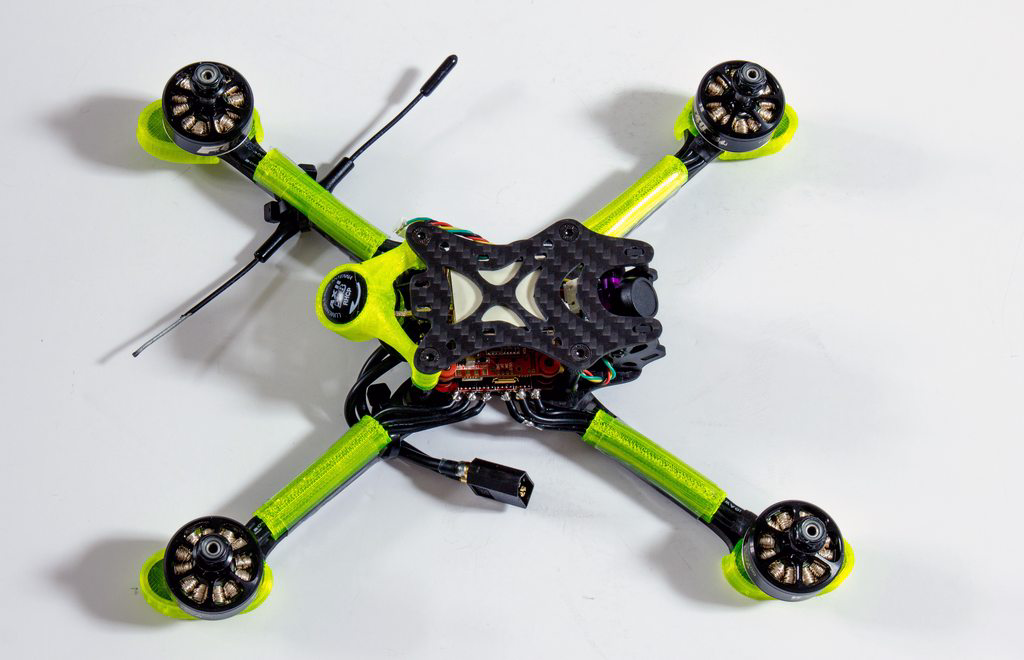
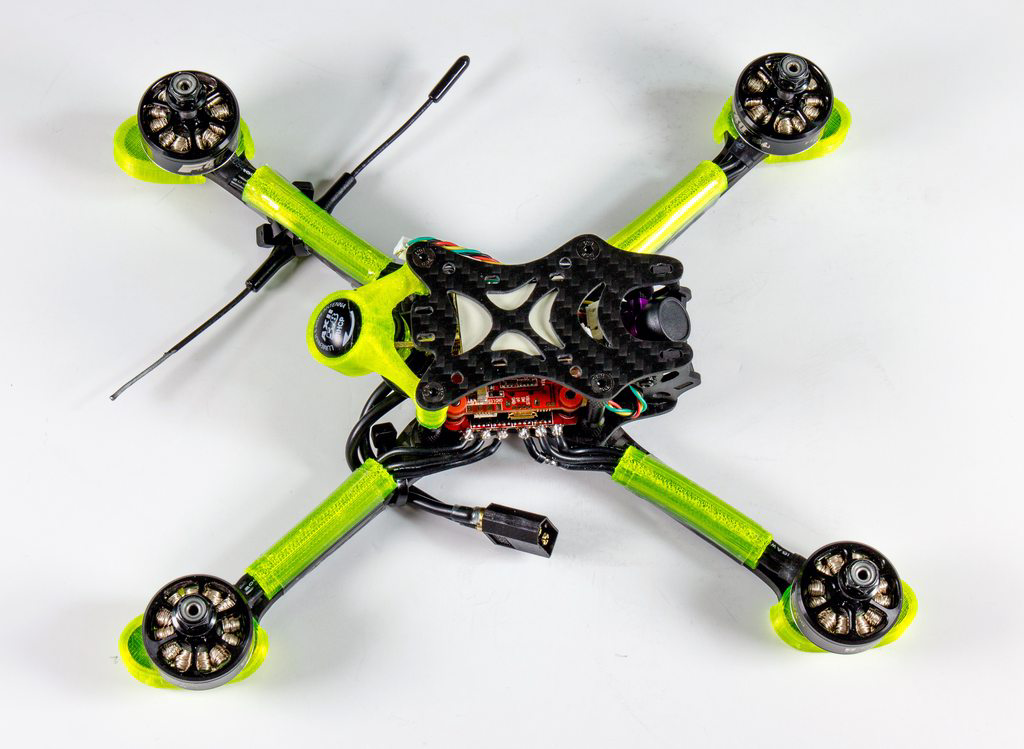
Dry Build
With all of the parts now removed from the packaging let’s put this together and see how it all fits, what parts are needed and how heavy it is compared to the product specs.
First things first I’ve inserted one of the shorter sizes of screws into the bottom plate. All of the key frame screws are countersunk which means there’s no protruding bolt heads making everything easier to mount, including your lipo.
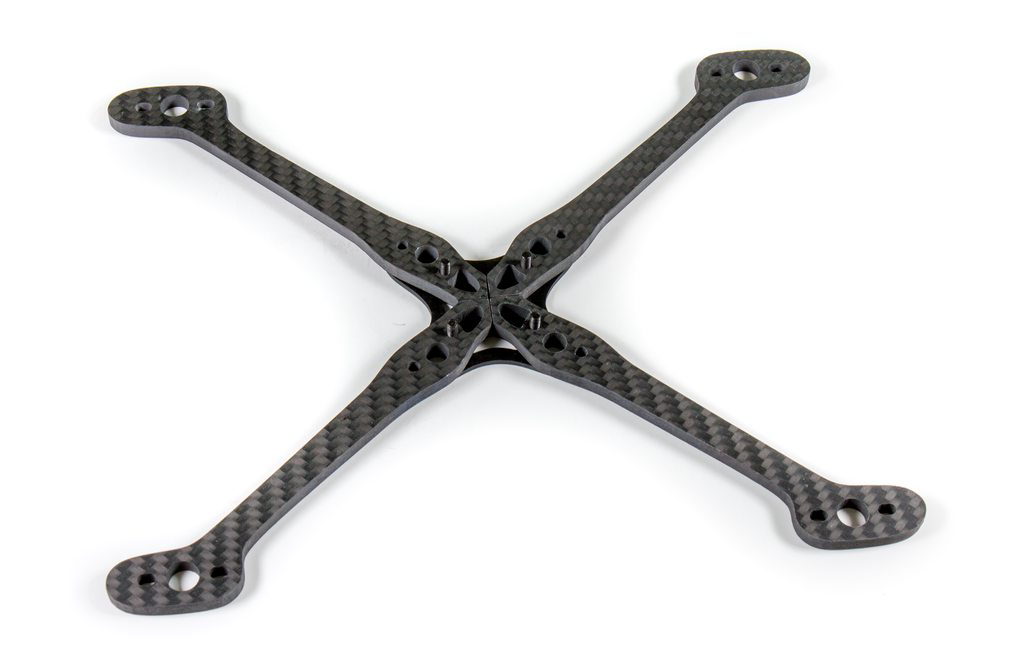
Next up we can slide the arms on and notice there’s still a chunk of material left in the middle of the arms to join them - this is a key part of any frame and adds so much strength.

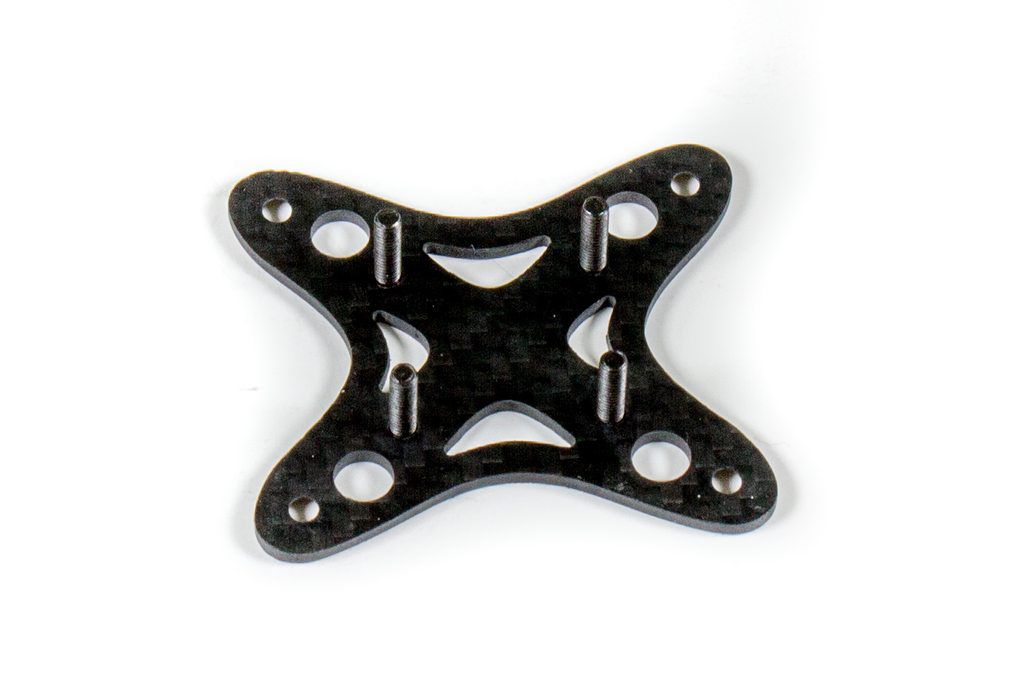
Once we have done that we can then screw the middle plate into place - the middle plate comes with pre-inserted press-nuts that make the attaching of the arms to the middle plate seamless and require no drivers to hold the nuts when tightening up the bolts. This is also where you could use longer screws for the 20x20mm stack if you are planning to go with a super small stack.
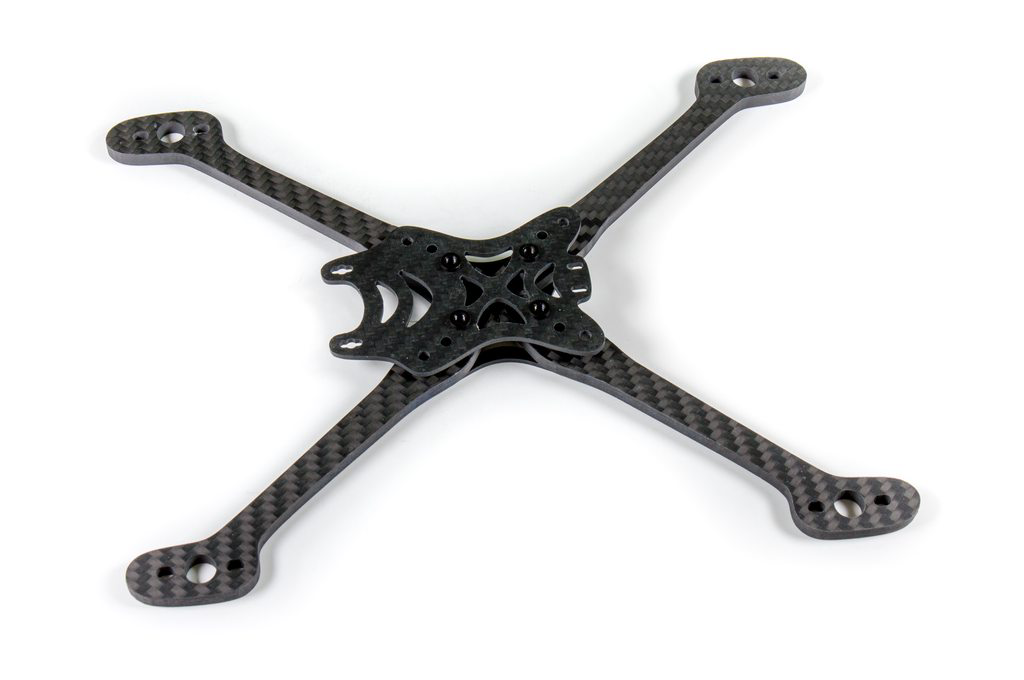
Next up we can add the outer screws that will attach to the standoffs to mount the top plate.
Here’s one of the cool features I don’t think gets shown enough, how to attach the screws for the 30x30mm stack, and how they interact with the bottom plate and the arms. Like the other screw holes, they’re meant for countersunk screws, and because the arms have holes in this exact place it means the only thing the flight controller screws are actually touching is the middle plate. It also means that removing the 2 arm screws will remove the arm without having to touch the stack whatsoever.
Here on the other side we can see the FC screws, secured by an initial nylon nut just for placement.
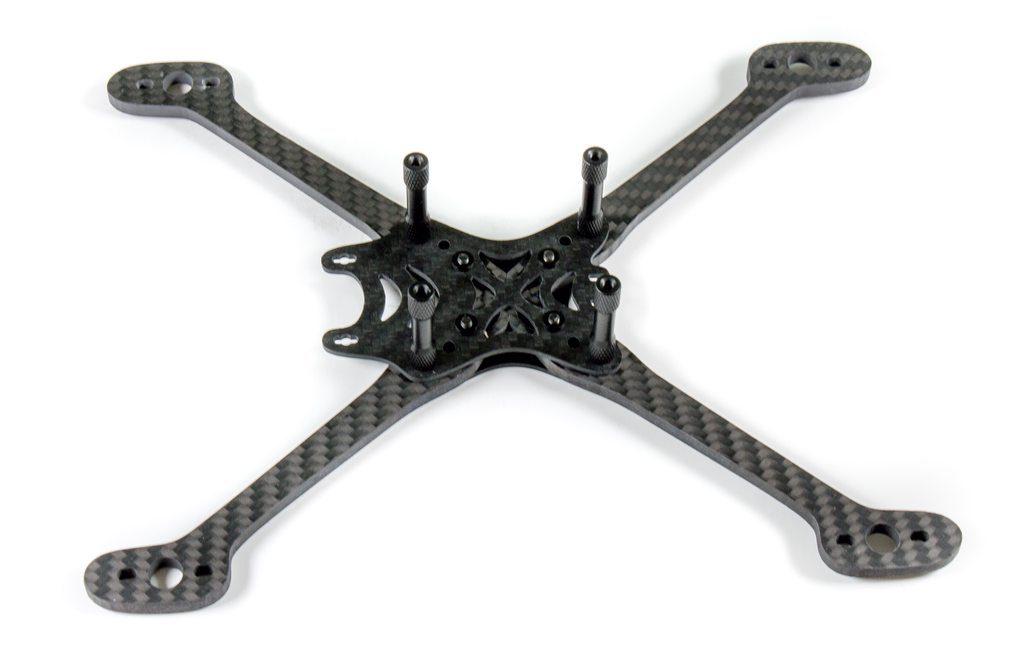
The standoffs have now been added on the outside screws we add earlier, these are both used to secure the arms, the top plate and also add strength.
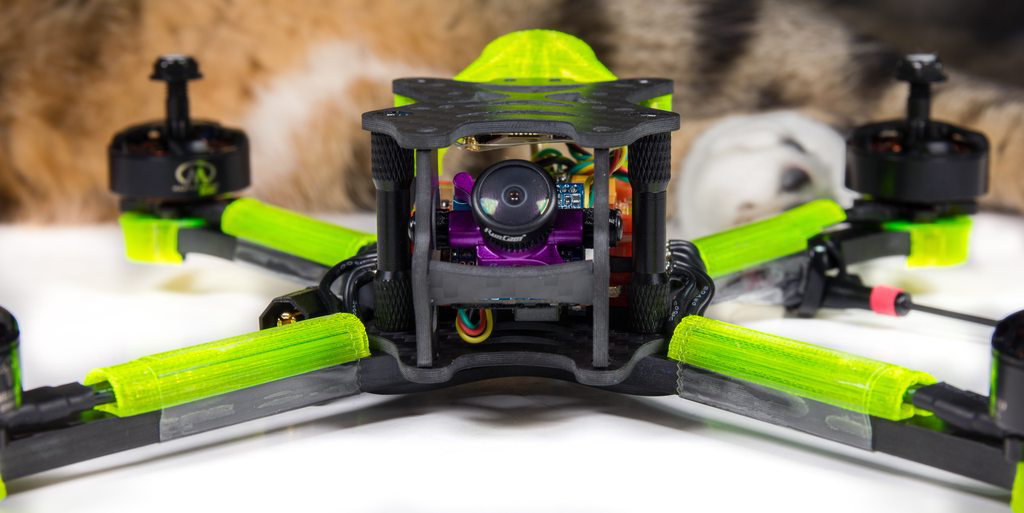
Next up we can put together the camera plates. These simply slide into one another, and if you break it more than once you can then replace the carbon plate with a standoff. TPU washers are also provided that go into the lower holes to screw the camera into. This soft-mounting solution means that even in the hardest of crashes your camera should be perfectly fine, and avoids the shock damage often seen in frames when a camera is hard mounted.
Simply slot in the camera plates.

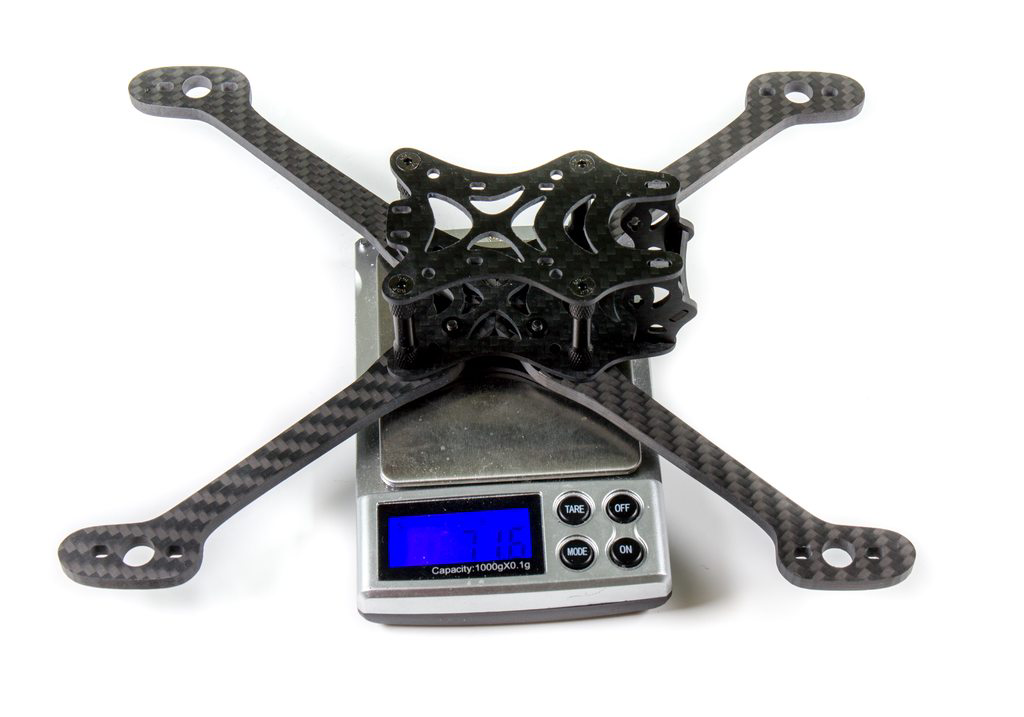
So I actually weighed the frame at 71.6 grams, 0.6 grams under the 72g suggest weight which means that the specs are entirely accurate. For the arm thickness and size of the frame I’d consider this a really good weight.
Build Log
Now in order to fully review it, you really need to build it with components, but not just components you have lay around but what you would actually run it with if the frame was going to be your race frame. After initially seeing the frame I suspected it may become my 2018 race frame anyway, so buying new components for the build was an easy & obvious choice and will help me firmly review the frame as critically as it should be reviewed.
The parts I’ll be using are:
- Bannilite Frame
- FlightOne Bolt V2
- FlightOne RevoltOSD
- TBS MasterPilot 2400kv
- TBS Unify Pro HV Race video transmitter
- TBS Nano Crossfire Receiver
- TBS Immortal-T Receiver Antenna
- Runcam Sparrow V2
- Lumenier AXII Video Antenna
- HQProp 5x5x3 V1S Propellers
- Pulse 1550mAh Graphene HV 100C 4S Lipos
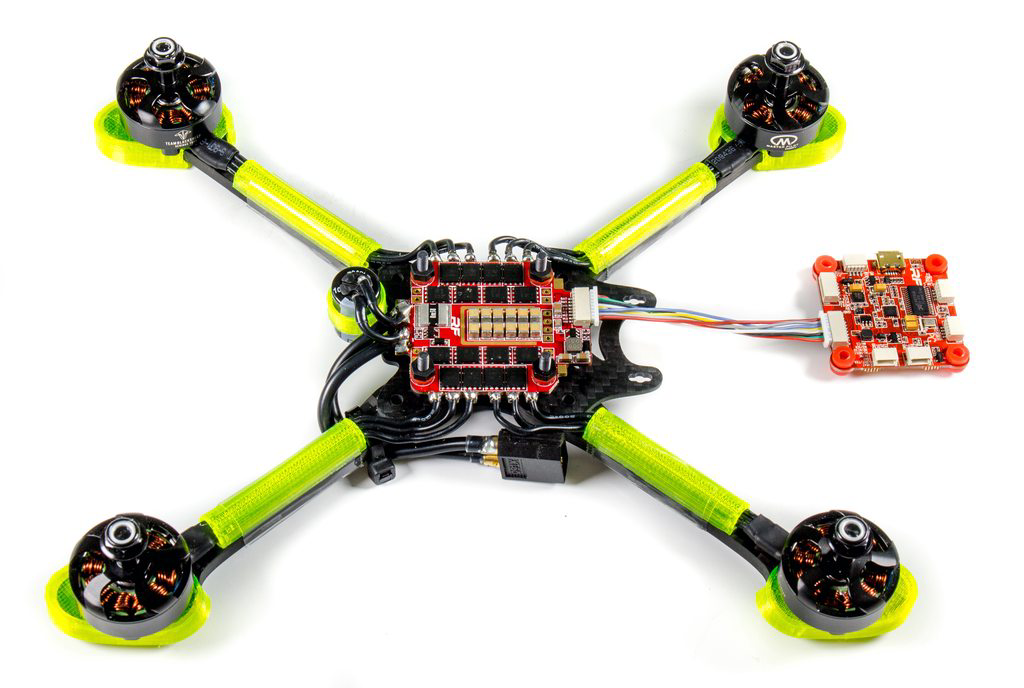
First things first is to add the Bolt. For my build I ended up using the 2nd longest screws so that I had enough room to directly mount the FC and Bolt V2, adequately space them apart from each other, and also leave enough room underneath the Bolt V2 to easily add/remove battery straps.
NOTE: In order for the Bolt V2 to fit, you will have to cut 2 of the extra VBAT pads off. If you look in the top left and bottom left corners of the ESC you’ll see there is actually a missing pad on each side. The ESC will not fit without these being cut as they touch the standoffs for the frame. This is a common issue on quite a few frames, but if you are scared of doing this I suggest running the HobbyWing 40A 4in1 which will fit perfectly without issues.

Next up I’ve added the XT60 pigtail, as well as a capacitor used to supress some of the voltage noise from the ESC’s. While the frame is super light and easy to build, adding extra things like this on can be an issue, and so I designed my own part to do it!
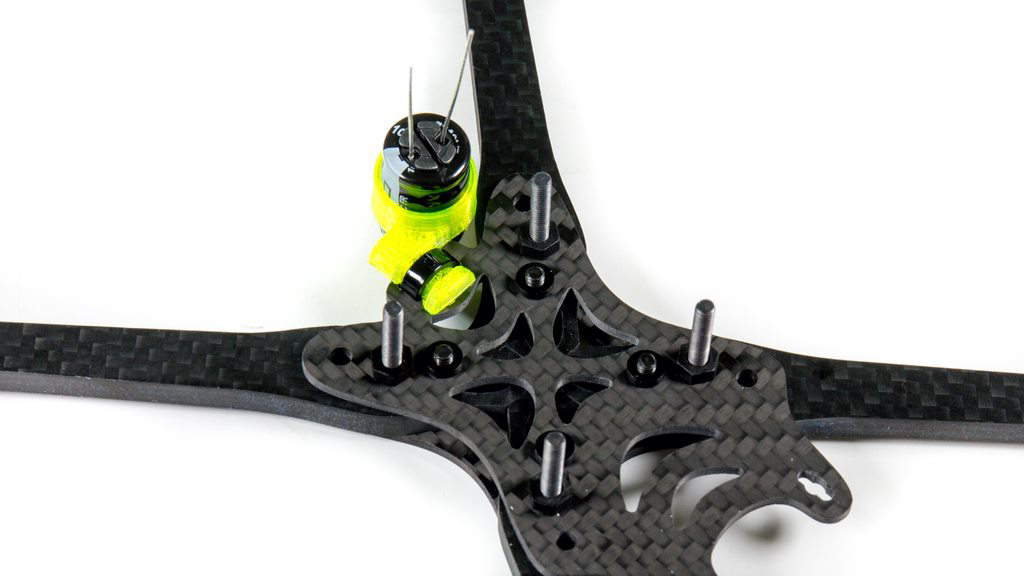
Using the frames rear cable-tie holes I designed a part that takes said holes, and then just offsets the capacitor to the side I didn’t want the XT60 to come out of. I made the opening slightly smaller than the width of the Cap so that when it slides on it is tight.
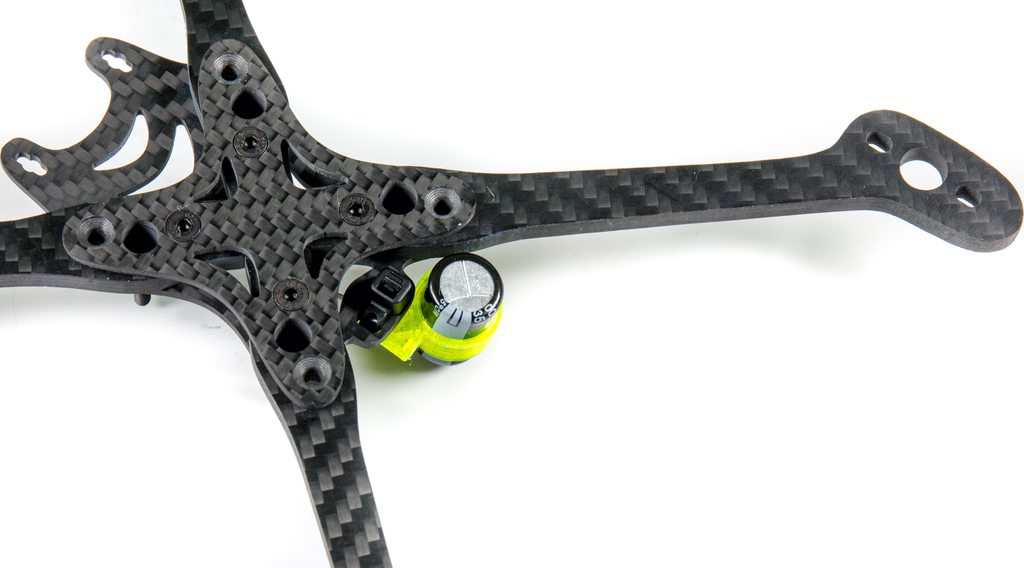
And here’s the underside view, the cable-tie is simple, effective, and out of the way.

With the power wires soldered on I can then add the capacitor wires on, I use 18 gauge wire here to remove as much resistance as possible. It also helps to keep the cap in place and to stop it from moving.
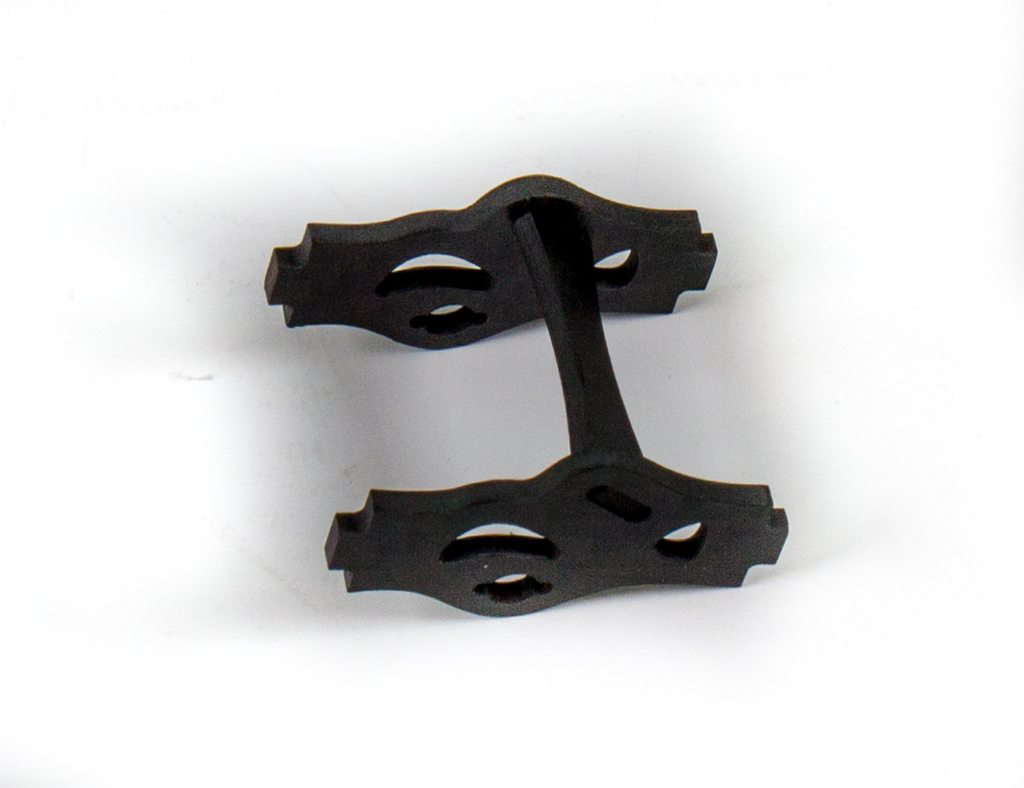
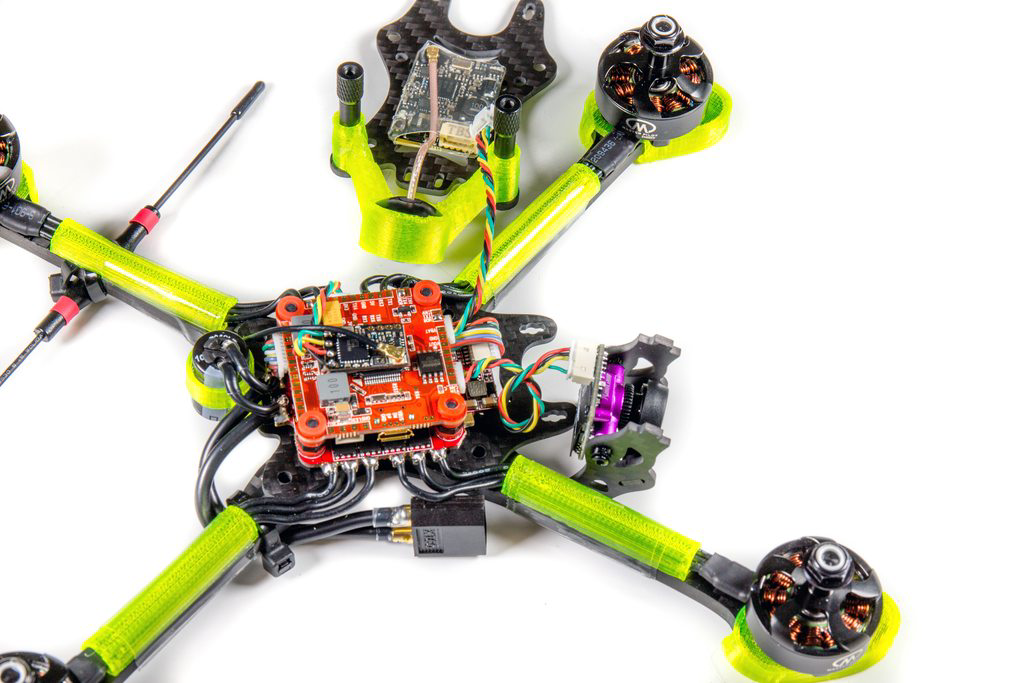
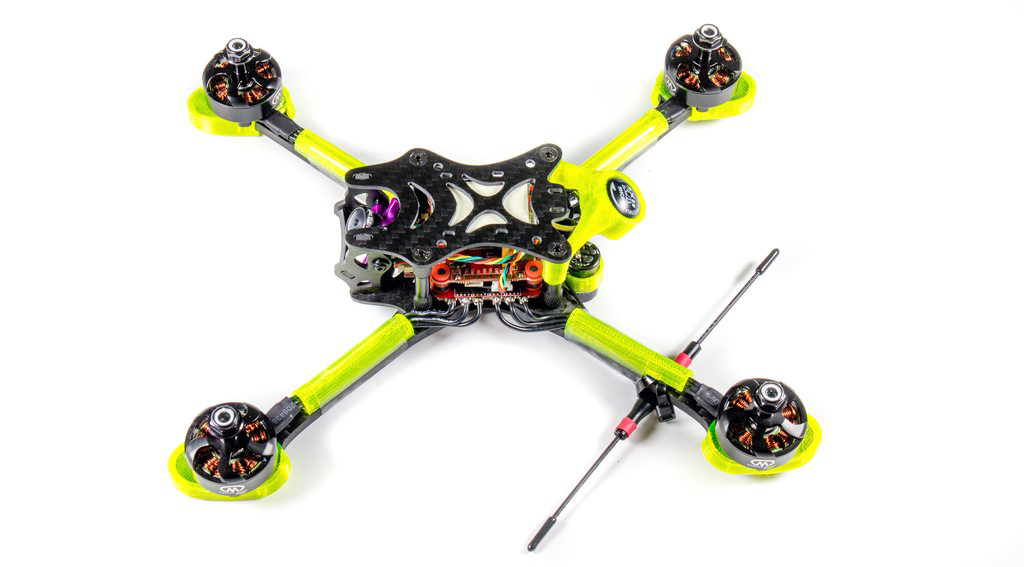
Next up I’ve added the ‘booties’ on to the ends of the arms, that do two things. Firstly, they dampen the motors slightly and remove any really big oscillations that occur, but they also protect the carbon in harsh environments such as warehouses. These were created by Larry himself so I just printed them in my preferred colour.
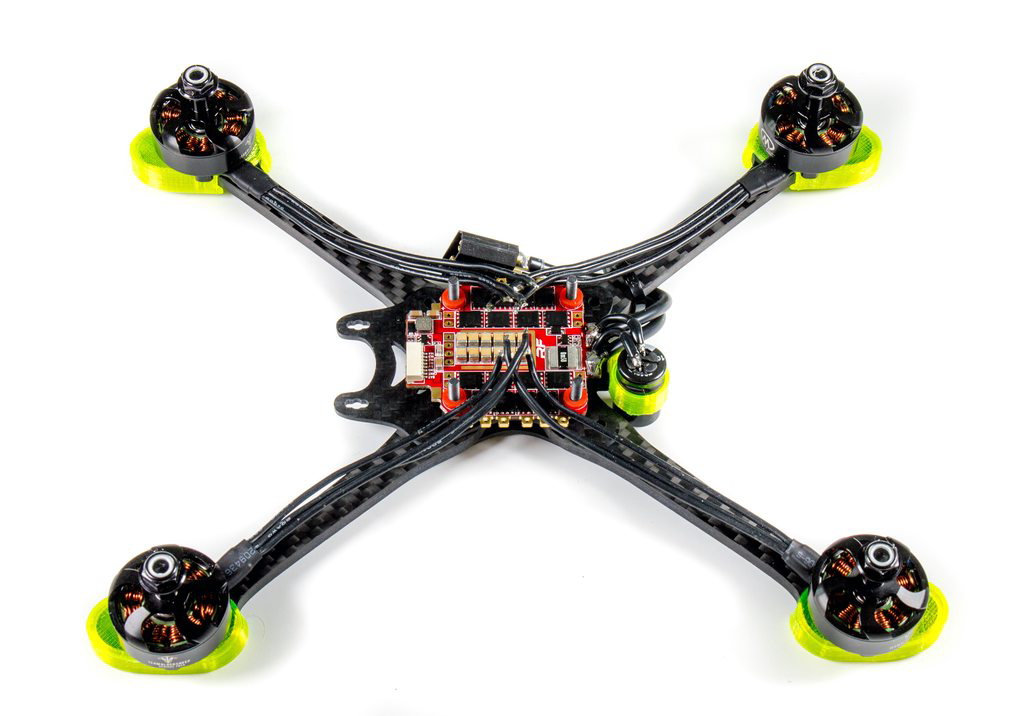
After that the motors were bolted down, and as you can see the wire lengths are just about long enough to solder directly to the FlightOne Bolt V2.
If you’ve seen my Featherlight 5" builds you’ll have seen these wire protectors before, albeit in a different colour. I’ve taken the same steps here and put wire protectors to stop propellers cutting any of the wires in a hard crash when the props get bent.
Once that is done the motors are able to be soldered to the ESC really easily. I have chosen to keep the wires outside of the ESC rather than wrap inside of it like some people do as it makes maintenance far easier.
Next up we need to add the RevoltOSD. The wiring here is super straight forward and just requires the wire harness provided to connect it all up.
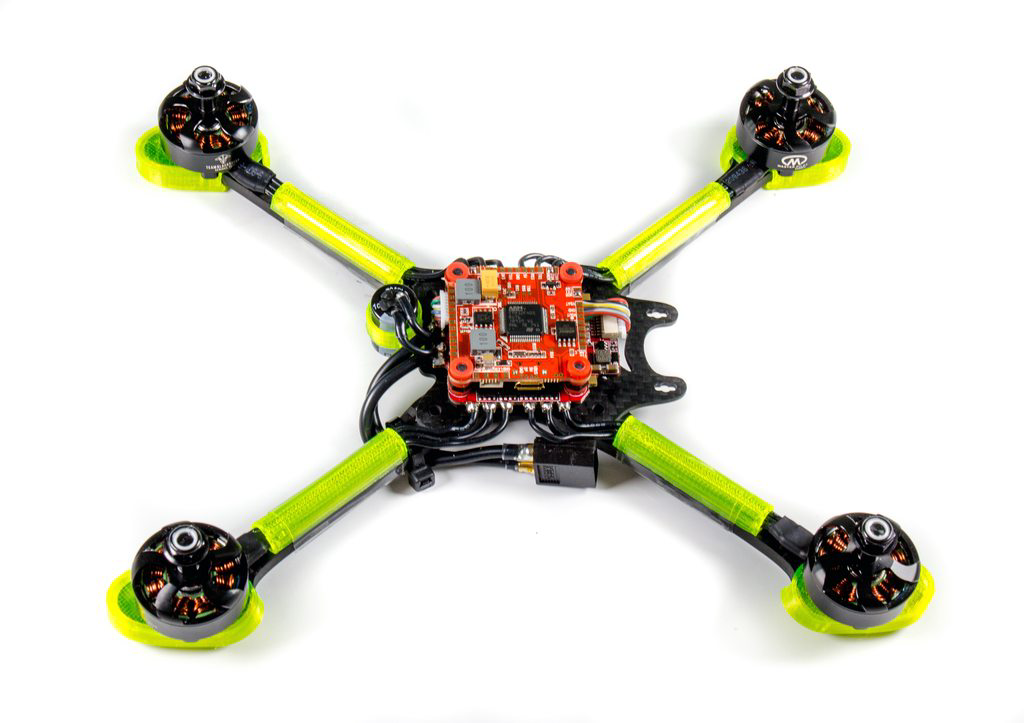
For easy of mounting ot her components I’ve rotated the flight controller upside down which allows me to stick my Nano Receiver on top of the big chip right in the middle. I could have done the same on the top-side of the Revolt, but the gyro is there and it is not advisable to have anything touching that at all.
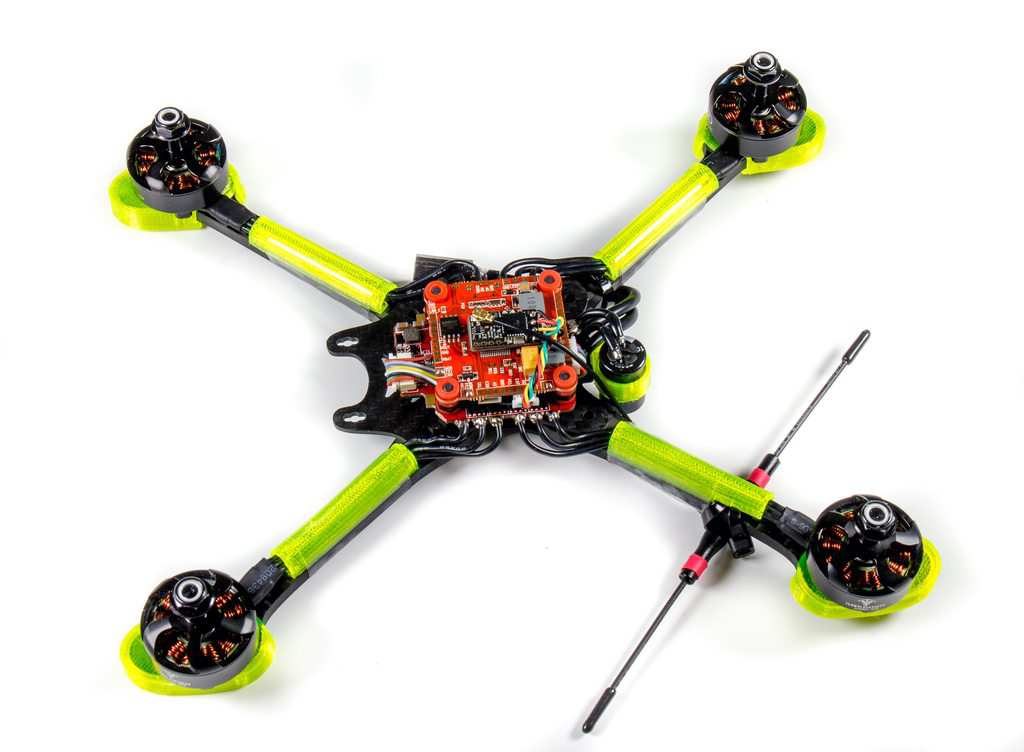
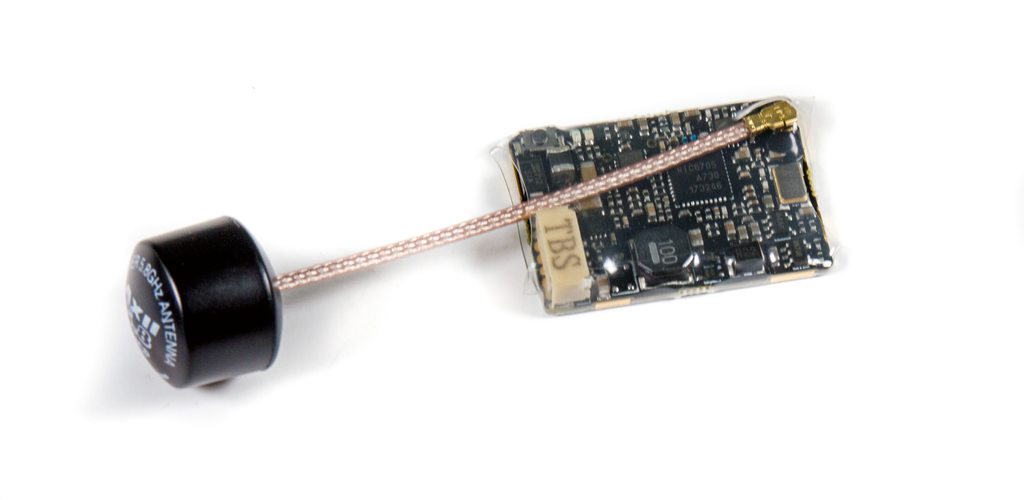
With that done I then added in the TBS Crossfire Nano Receiver and Immortal-T. The actual wiring for this was mostly plug and play again, as the RevoltOSD comes with a wiring harness that plugs in directly to the flight controller. Actually, this is the only wire that requires soldering - the ESC, Camera and VTX do not require any as they all use cables. We will also cover it later, but I’ve designed my own Immortal-T mounting solution from inspiration I found on Facebook a few days ago, it removes the need for 2 cable-ties, and also uses a single cable-tie that is on the same axis of the frame meaning it’s less likely to snap in a crash, and looks much neater.
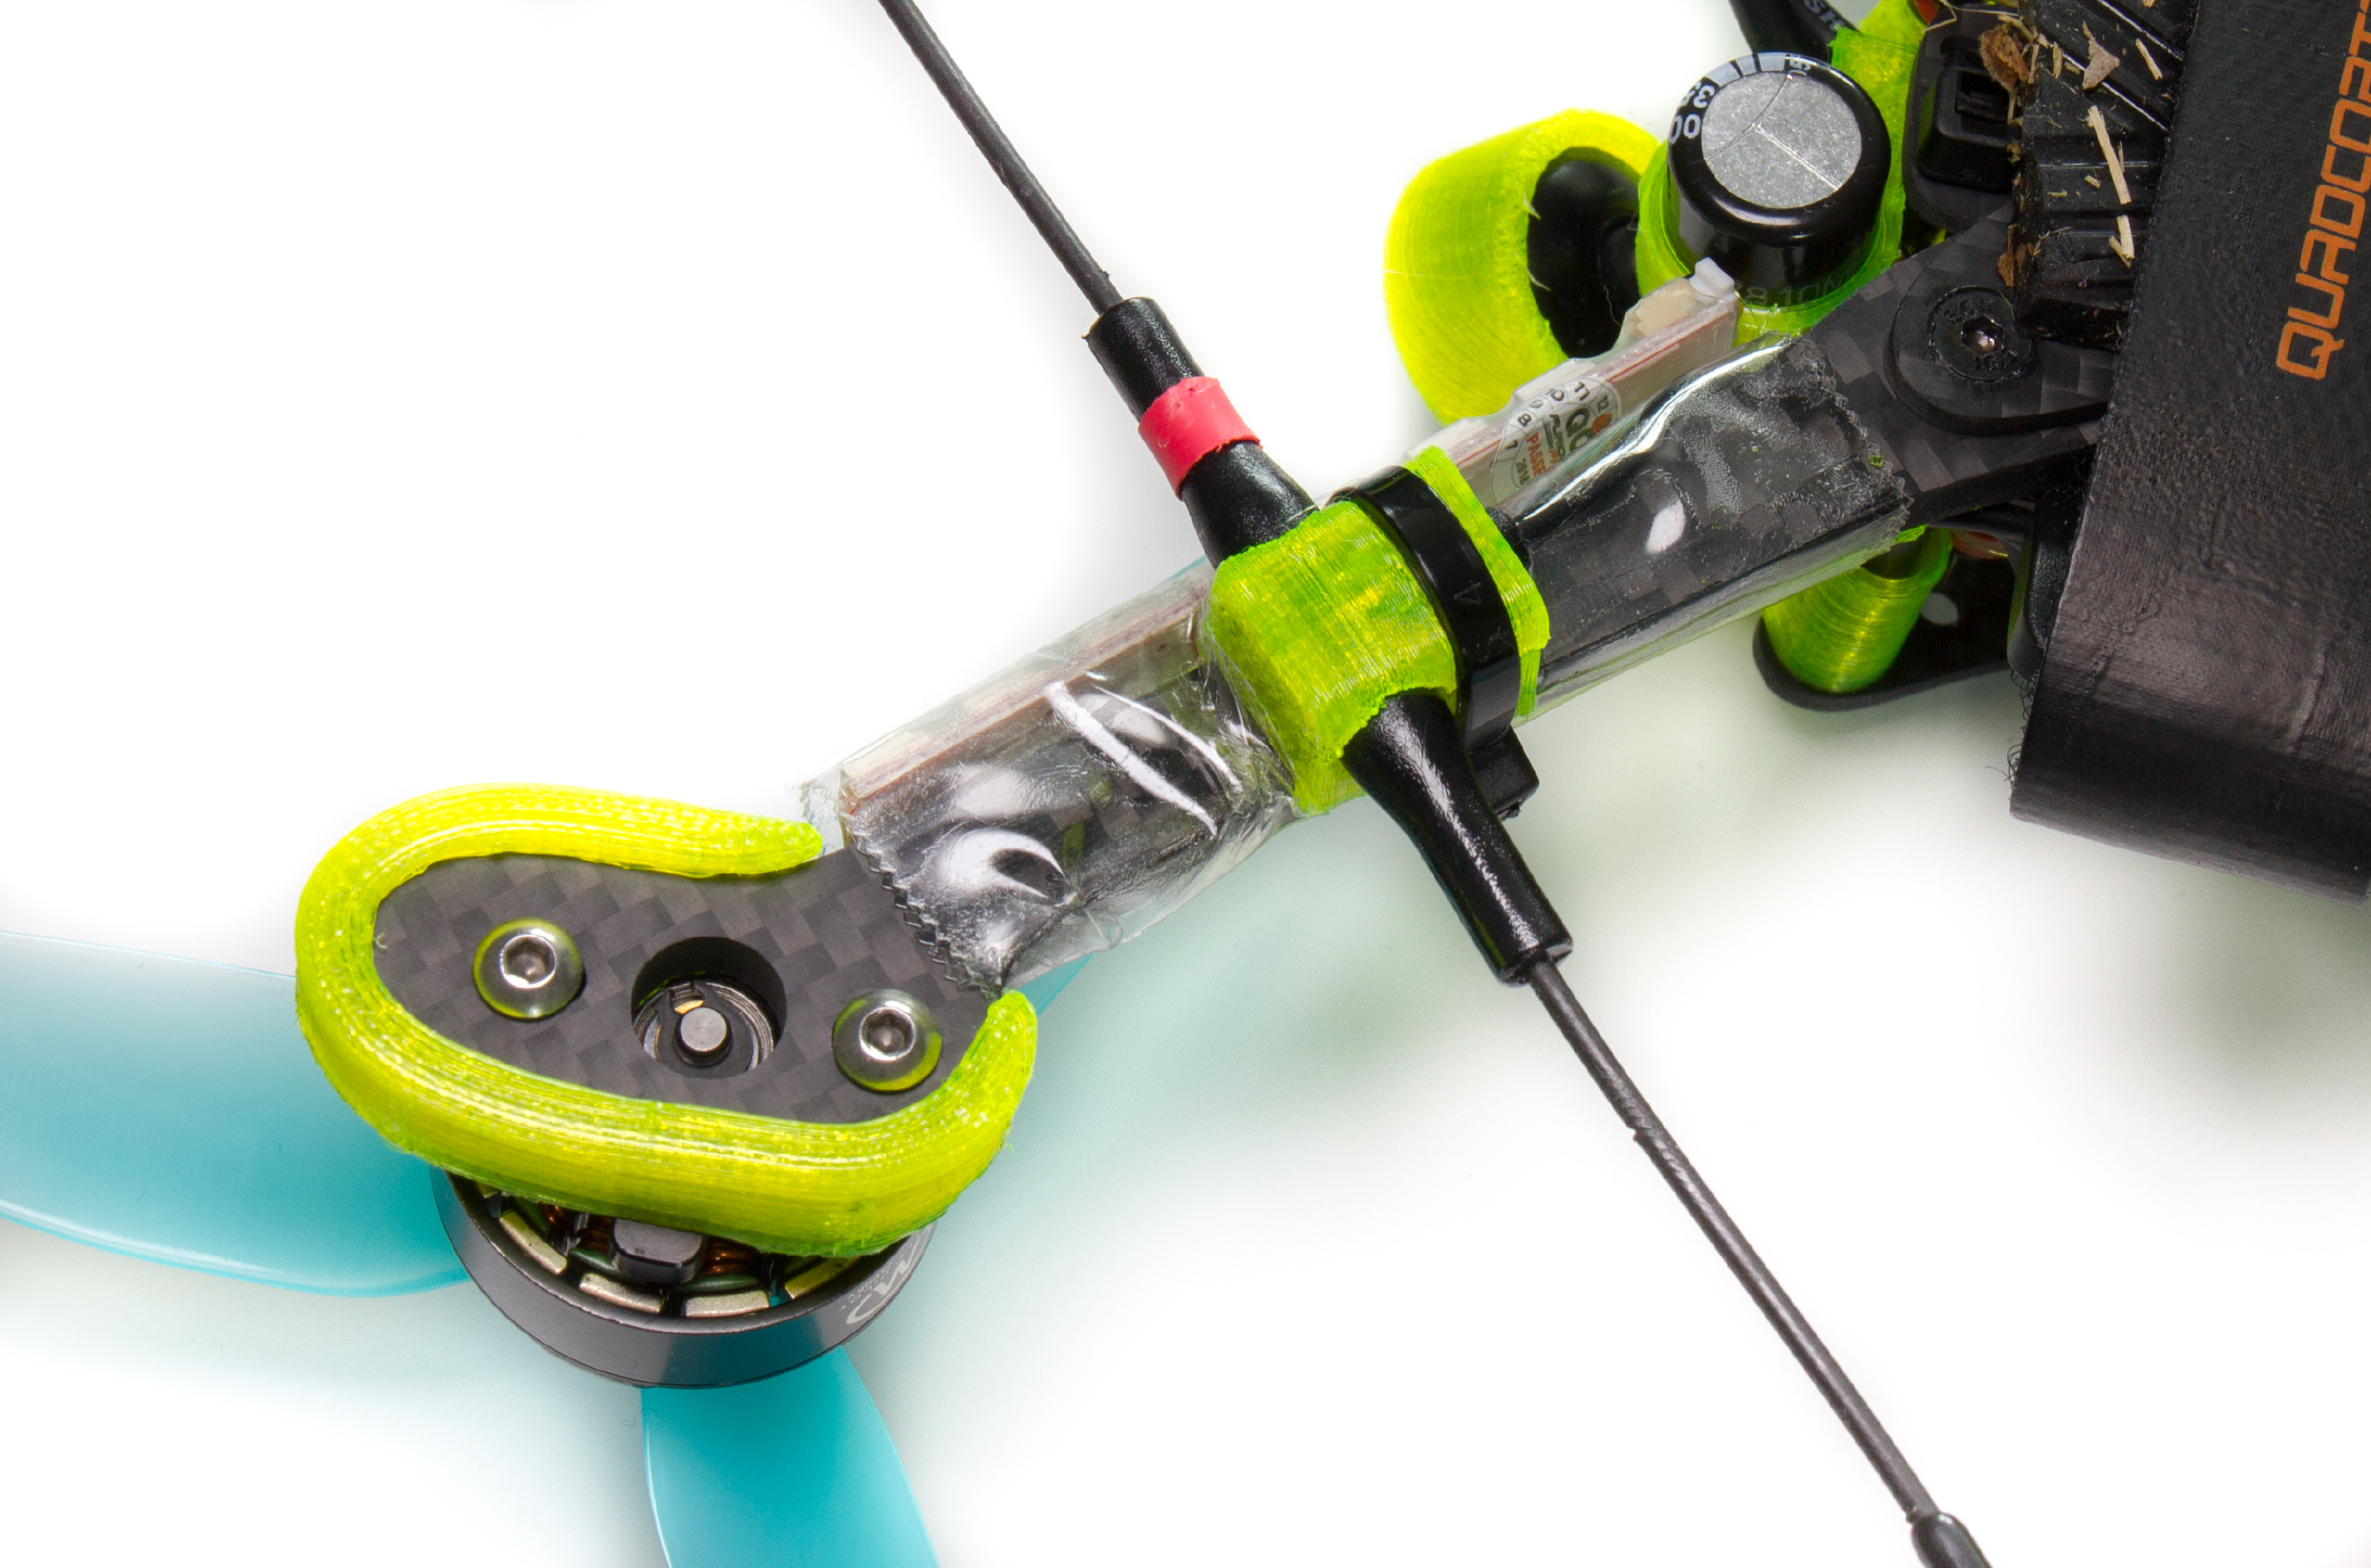
Here’s a quick picture of the Immortal T holder - the main use is only requiring a single cable-tie that sits parallel to the arm, rather than requiring 2 cable ties which are at bad angles on the arm and lead to easy breaks.
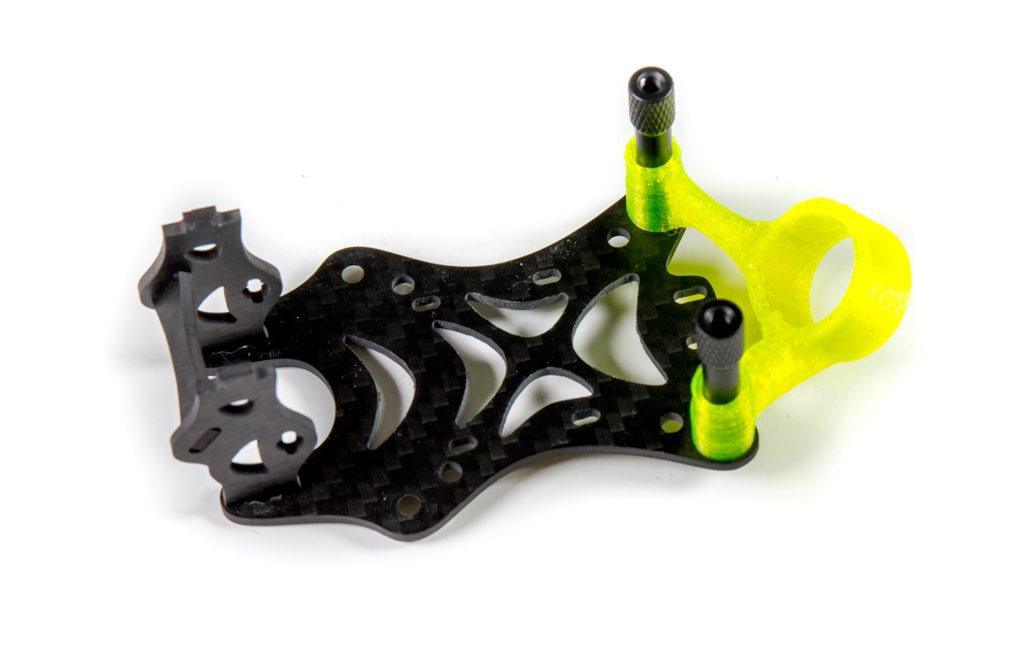
For the next part of the build we have the 3d-printed AXII antenna holder, also designed by Larry. This sits flush with the top plate so even in a crash it is extremely unlikely you will ever damage the antenna.
To make use of this I’ve removed the original Unify heatshrink, connected up the AXII antenna, and used the extra provided heatshrink to have an OEM installation.
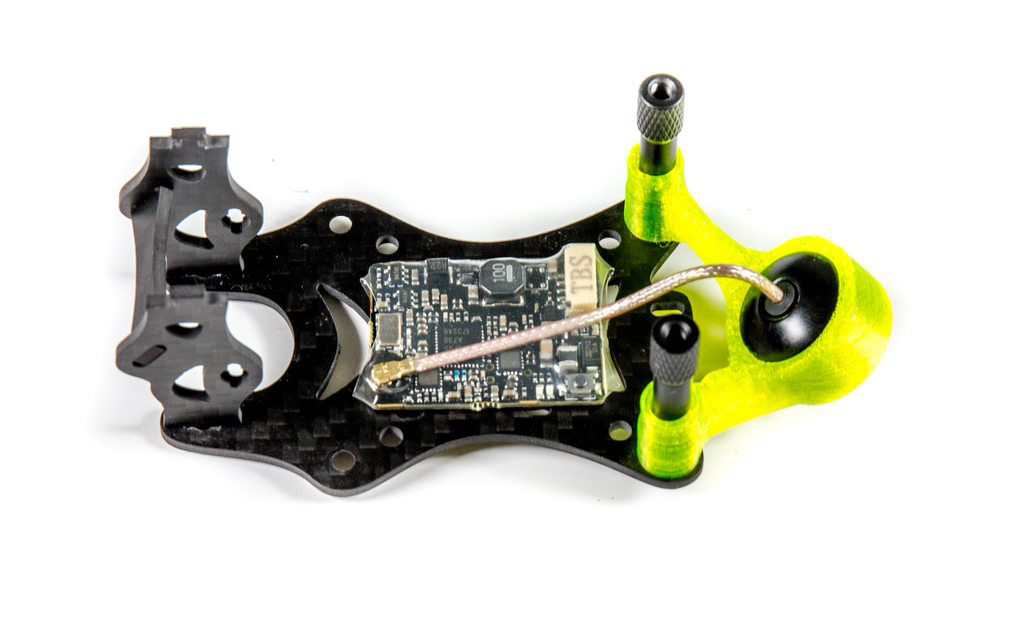
We can now add the Unify and antenna to the top plate, this means to take the top half of the frame apart we can just simply unplug the unify and everything splits apart for easy maintenance.
Next up we can plugin the Unify and Camera into the specified ports of the RevoltOSD.
And that is it, add on the top plate screws and boom we’re done!
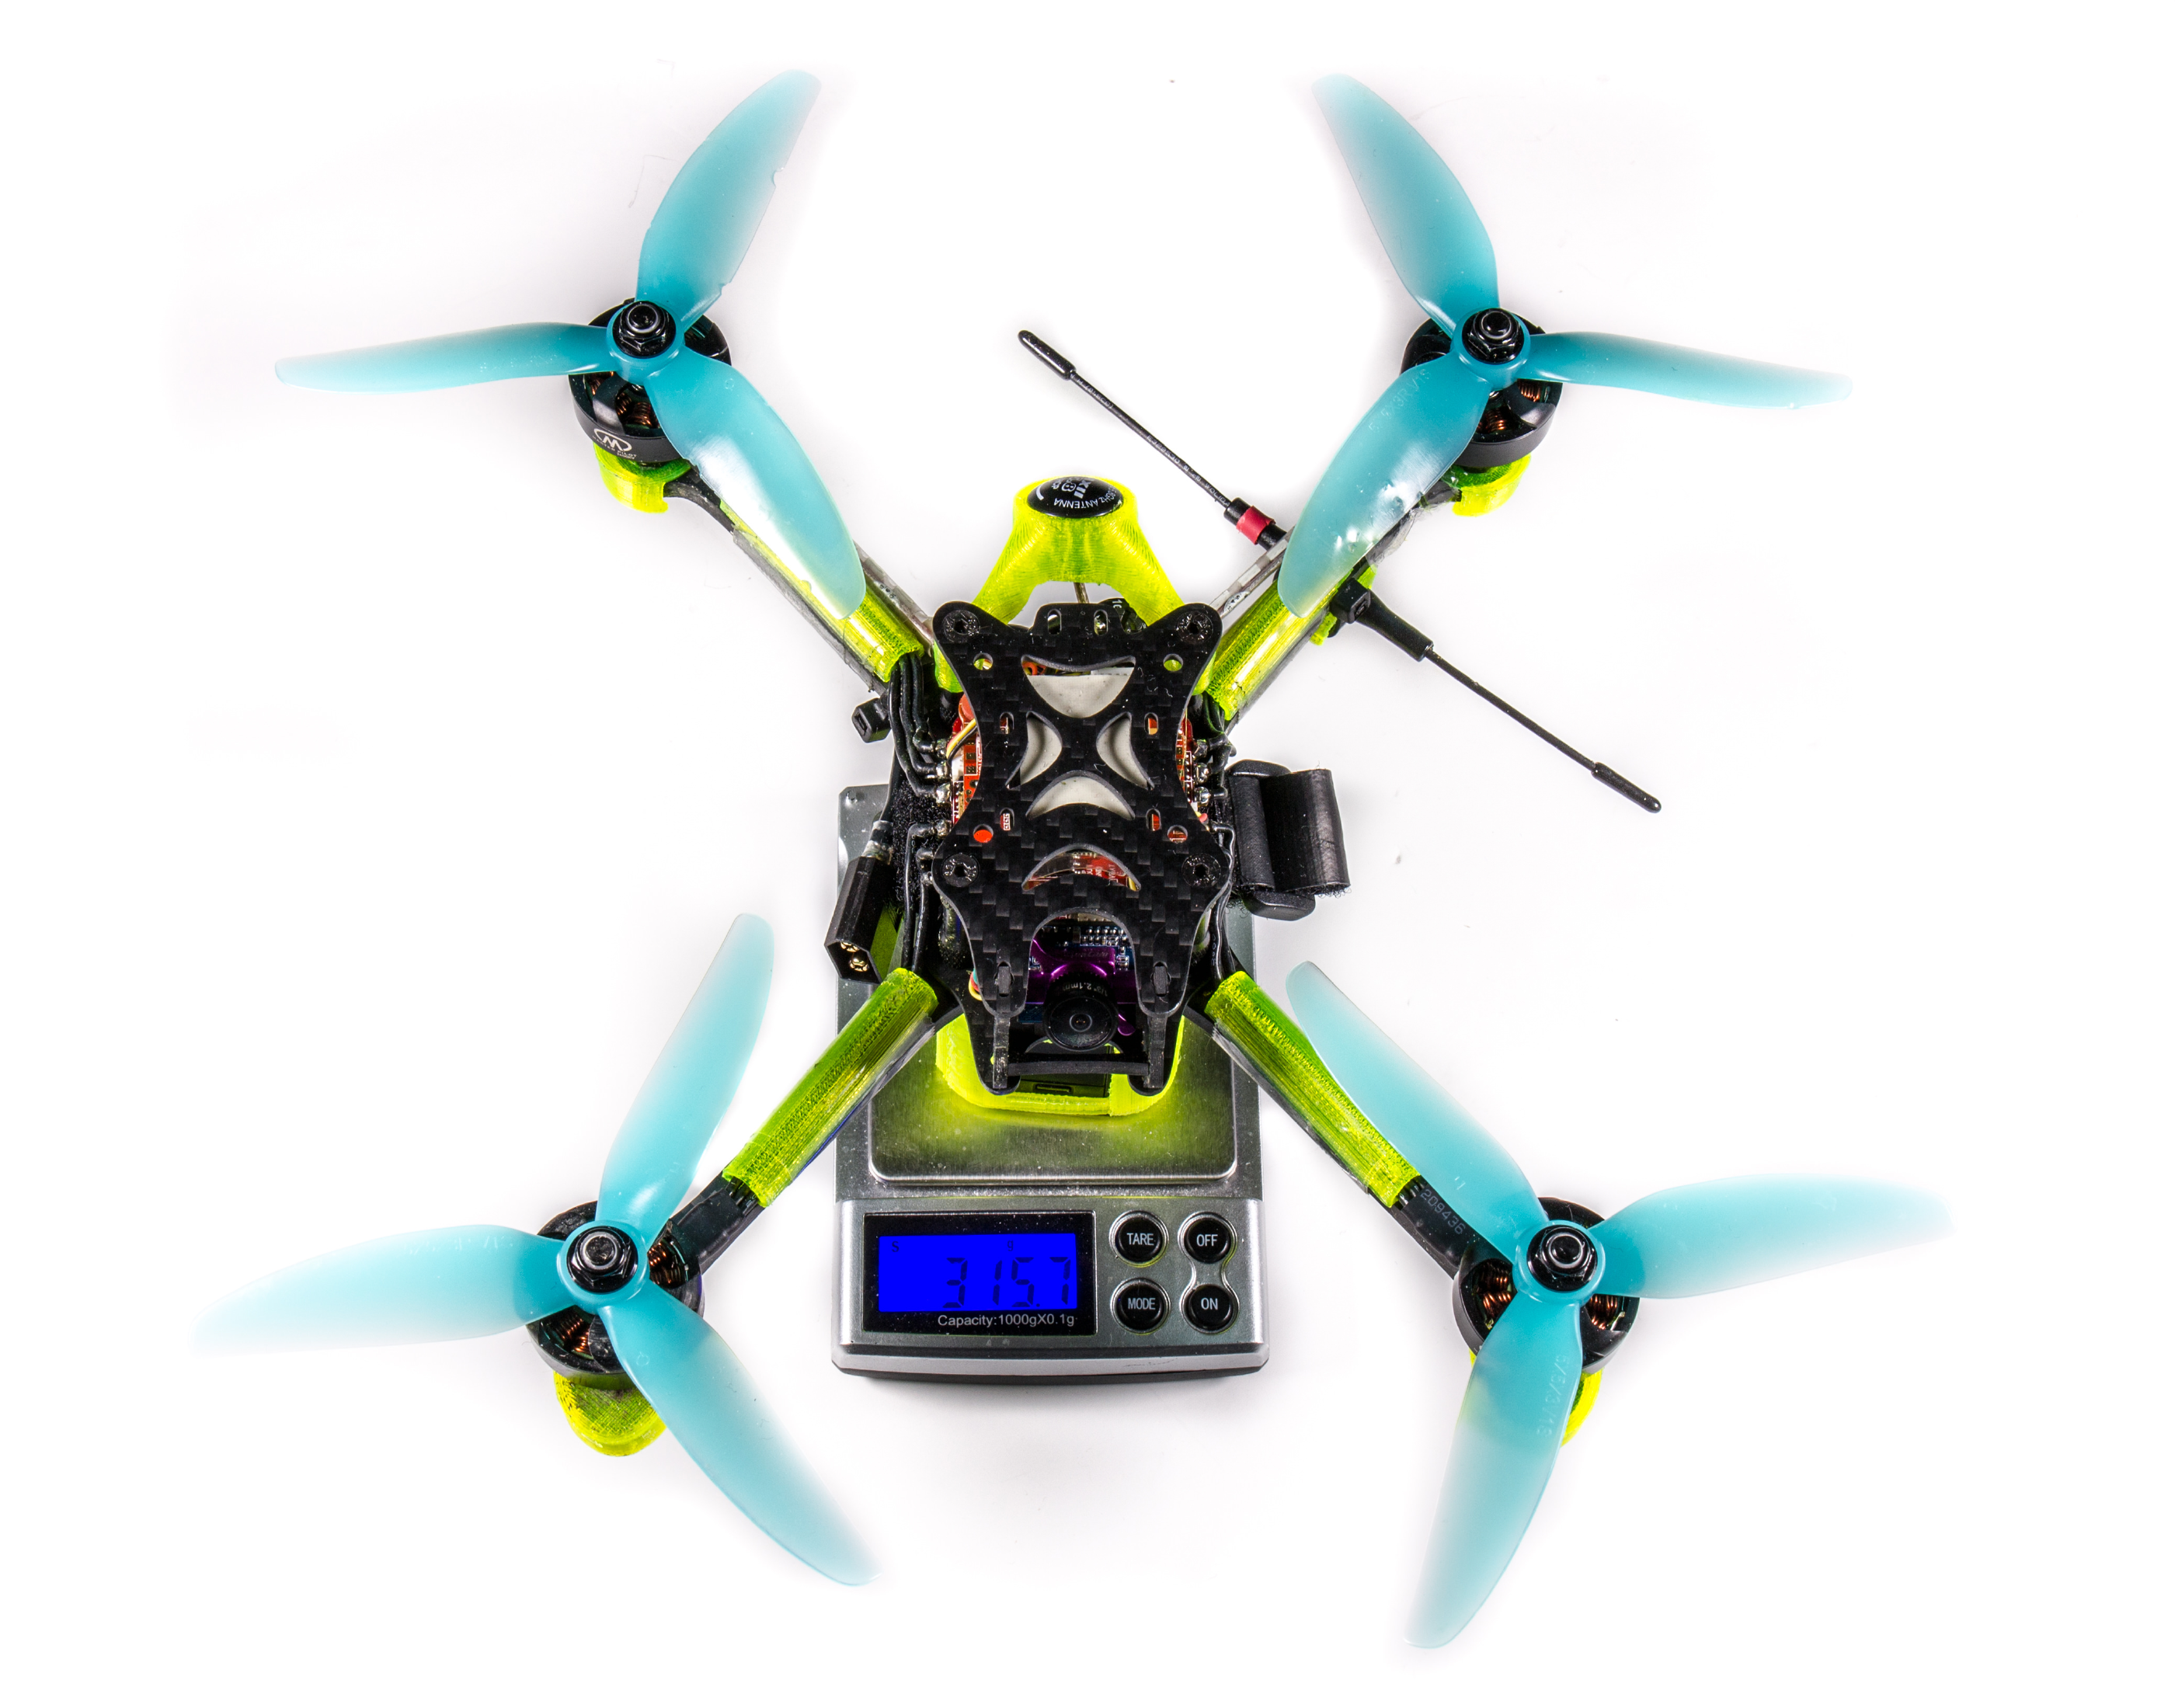
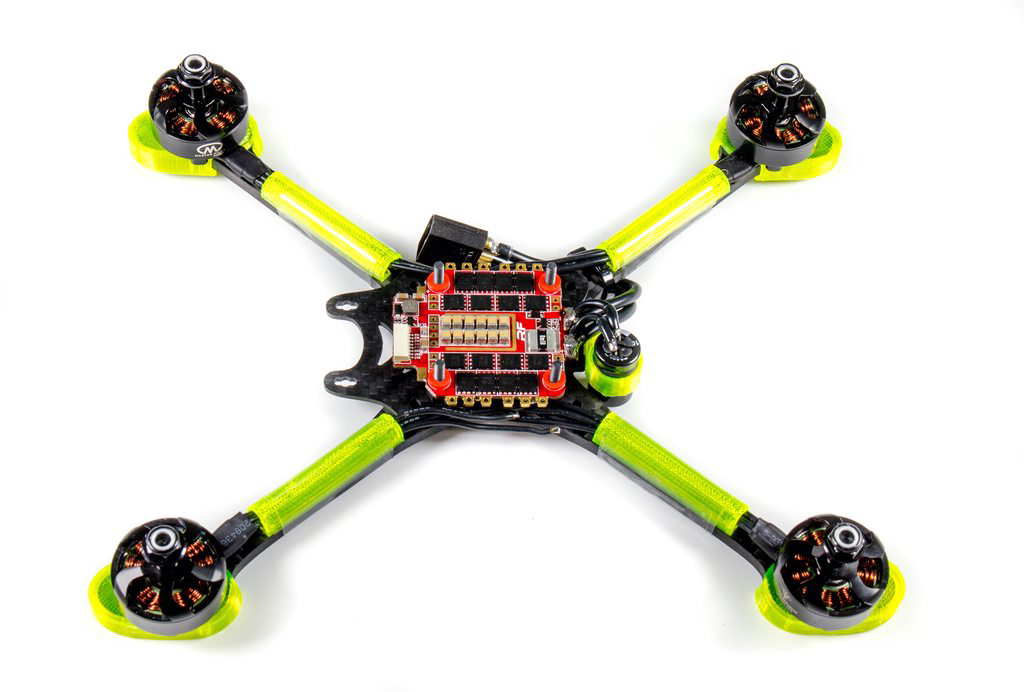
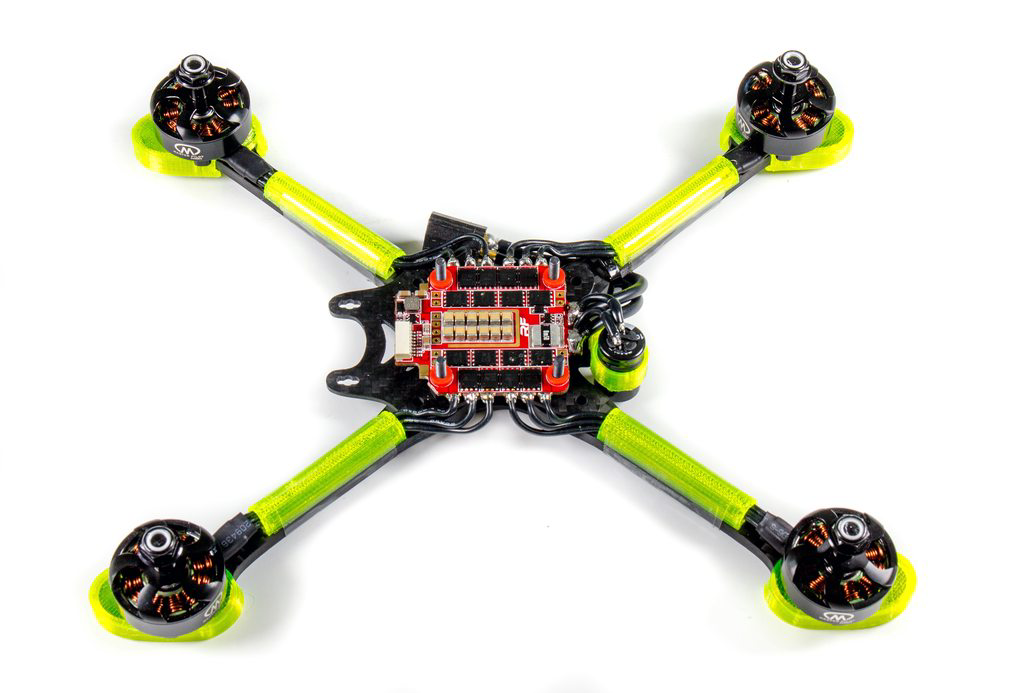
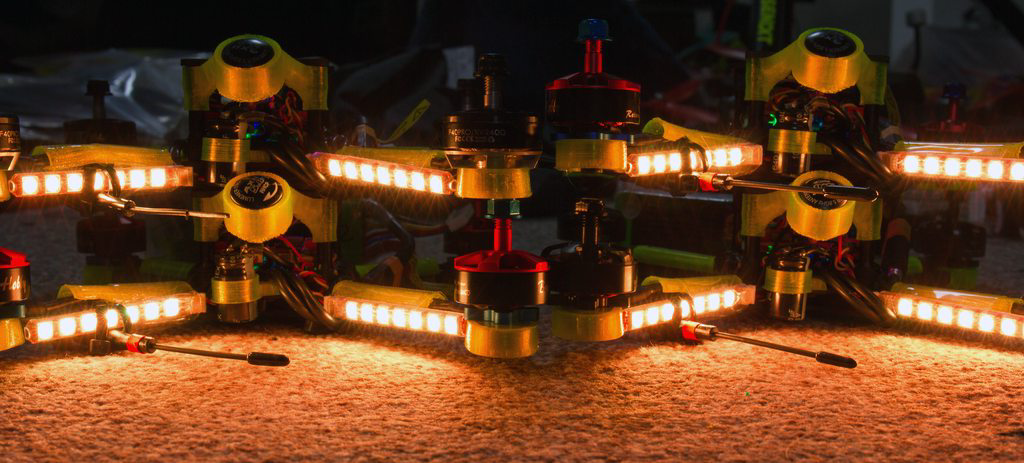
With everything attached including props and battery strap, the quad comes in at 315g. This doesn’t end up being all that light, probably down to the 3D Printed parts, but it’s a good weight overall, especially considering it has all the protection it needs built in, as well as having LED’s ready for the indoor racing season.
Custom Parts
Now, I mentioned there were not only provided 3d printed part files available, but I’ve also created my own pieces to add to the frame to ease installation and maintenance.
All of these parts are freely available to use on my Thingiverse account available here.
OEM Printed Parts
Custom Printed Parts
All of my own parts were designed because I can, and because I enjoy it, and there’ll be a followup post outlining what I did, how I did it, print testing and everything else that is hopefully interesting. So if that is something you want to read up about or get yourself into then please check my other posts.
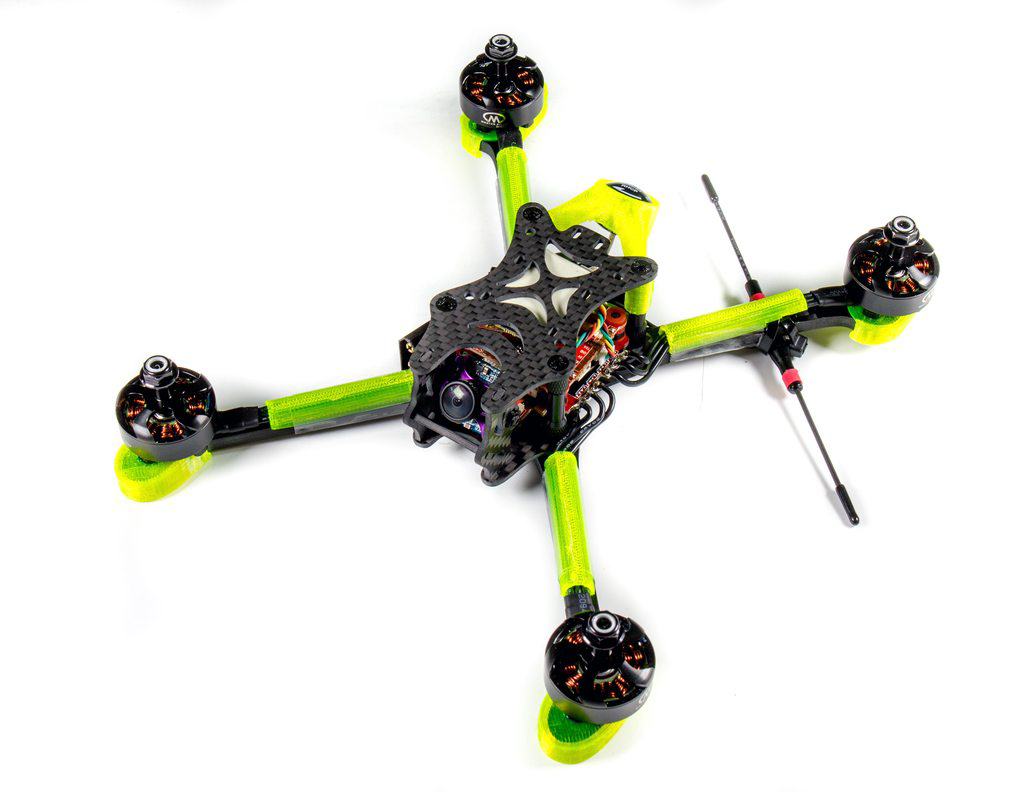
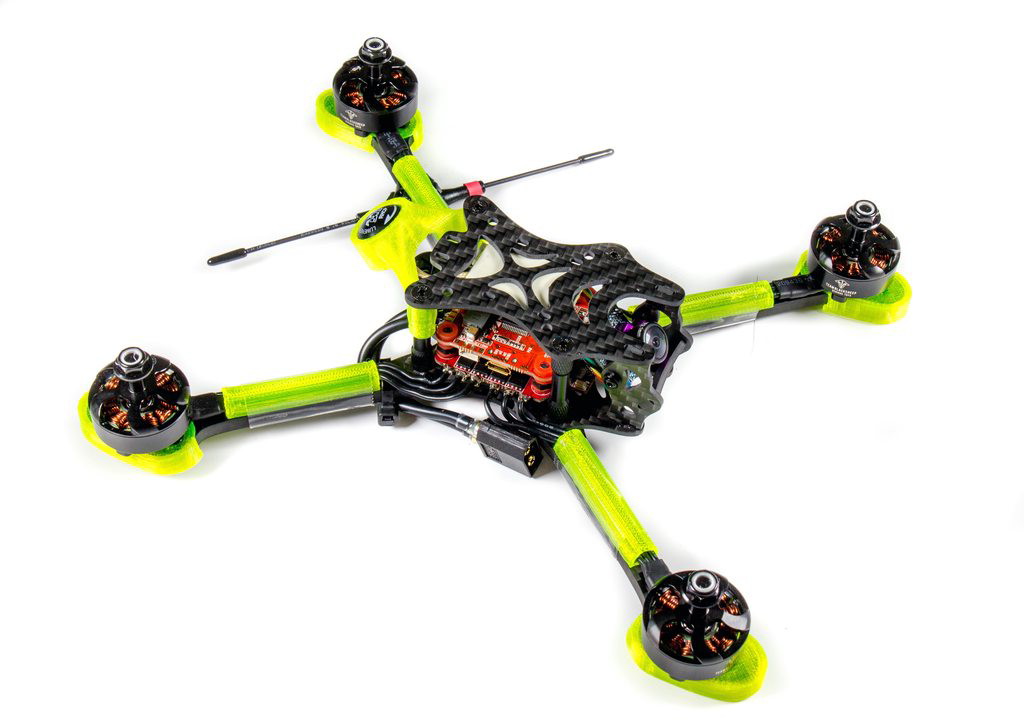
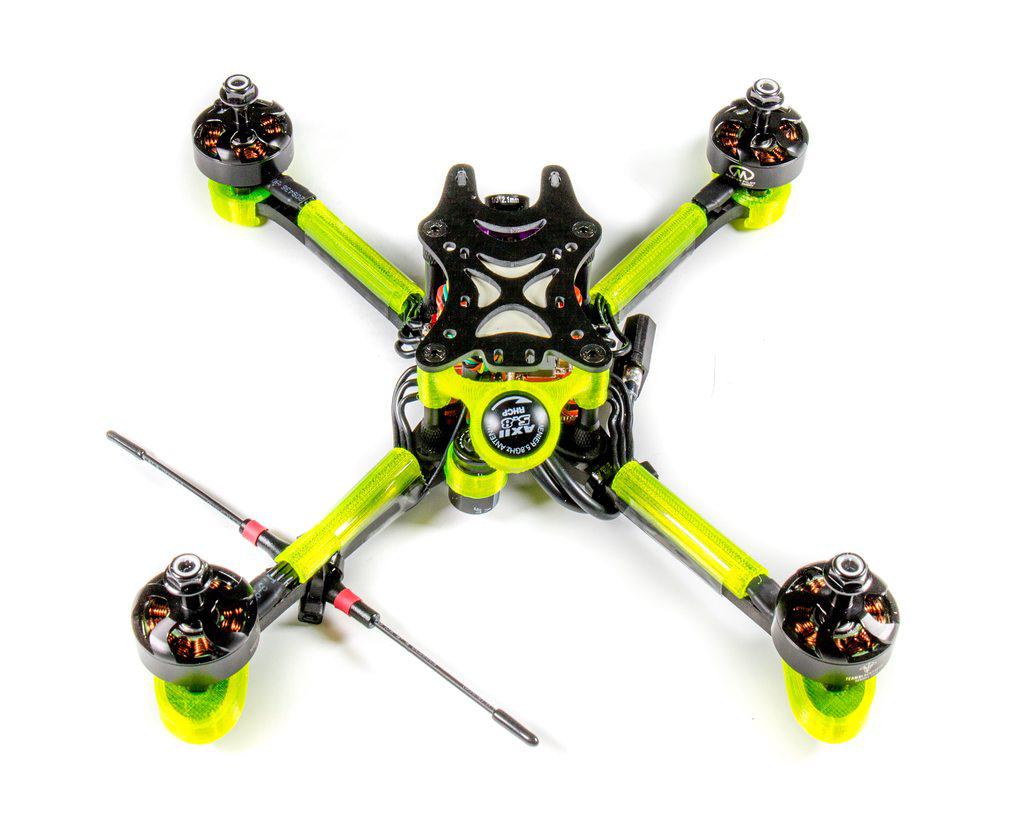
Final Pics
Flying Footage
So how does it fly?
Well I’ll let you decide - as ever with Frame reviews, flying footage does not really mean all that much. I will say so far I’ve crashed it a dozen times or so and have no visible damage, and nothing has moved or bent. Durability testing of a frame in reality takes a few races and a month or two, but so far I’m super happy with said durability.
Conclusion
Overall I think the frame his following along the current trendline of what the average racing frame looks like today, but with some extra features that others do not currently implement.
Positives
- Neat and functional methods to remove arms without touching the FC stack, effectively making repairs quick and remove any extra vibrations going into the mid section.
- Availability to run 30mm or 20mm stacks, or even run esc’s on the arms if you wish.
- Top & bottom plates have lots of extra holes for mounting components or cable-tying wires out of the way. In my case it allowed the cap to be placed without touching the arms.
- 3d-printed models for mounting extra components and protecting arm ends available from the manufacturer at launch, as well as a GoPro mounting wedge.
- Cheap and light - it goes without saying but the frame is priced extremely competitively, and FalconMultirotors are renound in the US for creating strong frames with high quality carbon.
- Tons of spares - I mean tons. No matter what kind of stack layout you intend to run, there’ll be screws provided to fit it just fine, with ample spares. And if it’s carbon replacements you need, it comes with a spare arm and spare camera plates too!
- Camera soft-mounts are a big thing, and most don’t know it yet. I’ve seen a LOT of hard-mounted ‘micro’ cameras, and I’ve also seen a lot of broken cameras because of it. The old school ’normal’ cameras were far less susceptible to the damage, but the small amounts of plastic means they’re cracking super easily even on light crashes, and this stops that nicely.
Negatives
- Carbon had slight residue when unpacking, I recommend washing it to remove any excess dust.
- I’m still 50/50 on this, but for now I’ll put it down as a negative just by how it looks - the arm design. While I have not had any damaged from impacts, you can see there’s a lot less material around the motors which will put some off immediately.
- No screws for motor bolts - it’s a shame as there’s SO many other sets of screws included, and the only reason I’m adding this is because the arms are 5mm, which means the stock 6mm screws provided with motors are NOT long enough realistically without stripping threads on crashes.
Final Thoughts
Overall the frame ticks many of the boxes for me personally as a race frame contender, and where those boxes maybe fell short I’ve managed to implement my own personal changes to improve on the frame for everyone to take advantage of. Provided it is durable enough during crashes to get back up again (I see no reason for it not to be), then this will likely be my race frame for this year. As I said above, there’s a lot of frames that look similar as we move into 2018, so it is all about going for a frame that suits you, repairs easily, and suits your flying style (stretch, true-x etc).
The Bannilite is available direct from FalconMultirotors (US), FPVHQ (US), PiroFlipRC (US), RaceDayQuads (US), GetFPV (US), Quadcopters.co.uk (UK), Airjacker (UK) and MakeItBuildIt.co.uk (UK) at the time of posting for $65 or £54.99 equivalent.